Path tracer per pixel samples and texture blurring

Started by
8 comments, last by JoeJ 4 years, 5 months ago

Hello,

I am making a toy path tracer and stumbled into a little doubt. As far as I know path tracers typically calculate the final color of a single pixel by averaging the result of all samples taken in that pixel (spp). This gives a nice anti-aliasing effect on the edges, however has the side effect of slightly blurring textures (because they most certainly do not have enough samples for each ray in the pixel, so samples have to be guessed with some kind of filter: I'm using bilinear in my case, and averaging bilinear samples causes blurring).

I believe this is basically the same problem that SSAA has, as discussed here: https://www.gamedev.net/forums/topic/547765-anti-aliasing-that-doesnt-blur-the-image/

How do path tracers usually deal with this blur? Is there no way around it?


Advertisement

I don't know how it's typically done, but have you tried using edge detection algorithm and sample multiple times only on the edges?

The 'blur' is usually intended.

For example, if you would use simple unfiltered texture lookups, accumulating random subpixel samples would not only AA magnified texture texel borders in the same way it does for triangle edges, it would also correctly average all texture covered by the screen pixels frustum pyramid, so mip maps would not be necessary.

So you can see this as correct integration of the whole pixel over it's entire area, including all geometry and texture - something we can not do with rasterization.

(Still, in practice it is worth to filter textures to get better quality from less samples, and having a good filter is not trivial, and i don't know anything about it.)

But all this is just a bonus you get for free. Because path tracing needs many samples anyways to integrate lighting, we use those many samples also to integrate the pixel area (or time for motion blur, or DOF).

Now if you think of this, you might realize what you see is an advantage not a problem. But if your image still looks wrong to you, you might need to post image / subpixel ray setup code.


I see.. my doubt comes from the fact that path traced textures with bilinear filtering tend to look blurrier than the rasterized counterparts (because of the subpixel averaging going on).

So I guess in some cases a simple closest filter may actually give sharper results for path-tracing? (Unless objects are seen from too close and pixelated)

yoshis90 said:

I see.. my doubt comes from the fact that path traced textures with bilinear filtering tend to look blurrier than the rasterized counterparts (because of the subpixel averaging going on).

So I guess in some cases a simple closest filter may actually give sharper results for path-tracing? (Unless objects are seen from too close and pixelated)


Yes, aside closest filter you could also make the subpixel area smaller, but this would also hurt geometry AA.

But before you do any of this (it's both wrong), make sure your subpixel area is not accidently larger than the pixel.

It is common to use a larger area and compensate with weighted distribution, e.g. using a tent filter. I tried this myself, but because i render at very low resolution i found the results to blurry and went back to sampling exact pixel area using uniform distribution.

Let me try to demonstrate results you are getting (time to put the new site to the test, this is going to be image heavy). For this I've used real time path tracer (used in GROOM game).

So let's start with various result (what I have experimented with), first randomization of ray direction:

Fig. 01 - Randomization of ray direction, left to right - 0.1%, 0.5%, 2.5%

This method is extremely fast, but will end up in blurring of more distant objects (it behaves like if your focus was at 0). GROOM used this solution (with 0.1% randomization).

The physical simulation of camera is also possible by doing proper depth of field, which looks like this (increasing lens angle shape, constant focal plane):

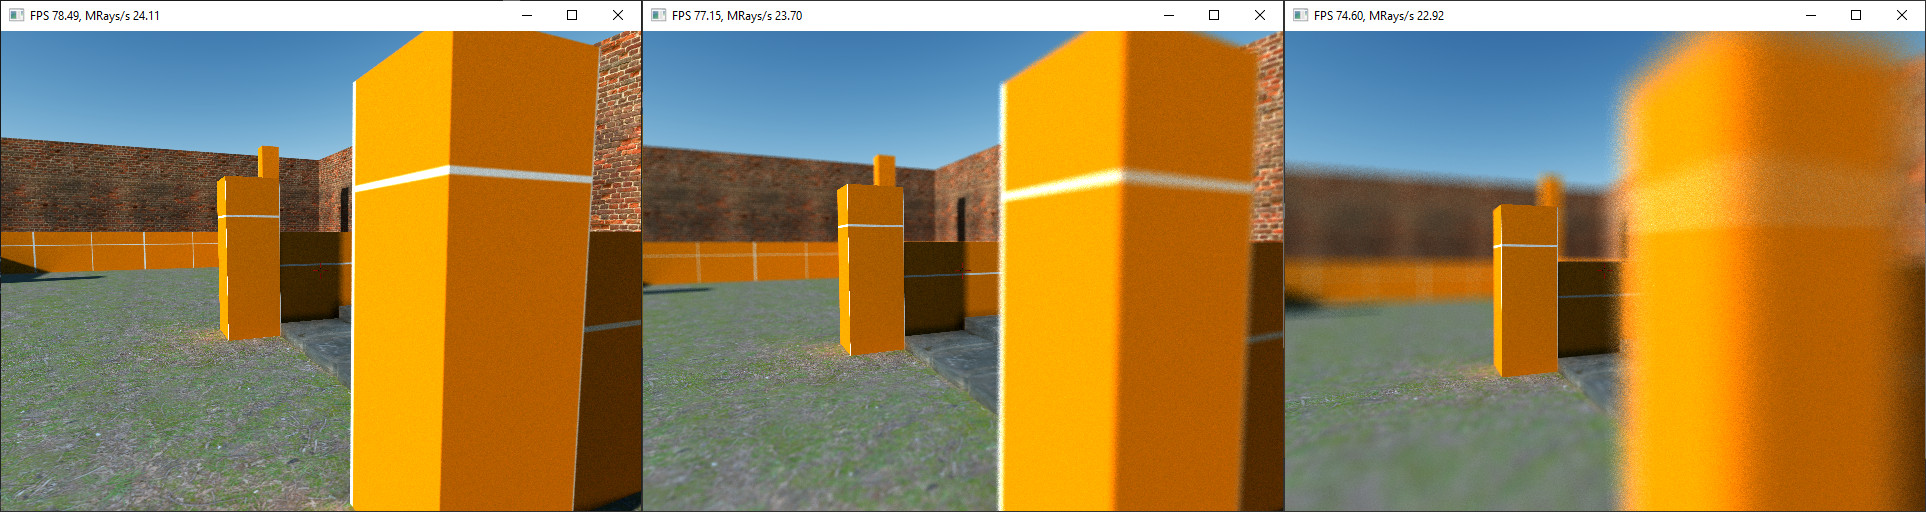
Fig. 02 - Proper depth of field simulation (lens angle grows from left to right, focal distance is the same)

In Fig. 02, notice the aliasing around the focus plane. That can be solved by combining this is the previous method. This method is a bit more expensive, and I personally didn't want to use it, as in my opinion depth of field should be used in cut-scenes but not in gameplay (as you technically don't know what player's eyes focus at).

Now, you have asked about texture filtering - GROOM uses only bilinear filtering (no mip mapping), and for comparison (single vs. multiple samples per pixel (+ temporal filtering in second one)). I hope youtube didn't destroy the noise though (it is captured as quite low-resolution intentionally, I worked in window as that is far more comfortable to me ... in worst case I'll record it anew in at least 720p format).

EDIT: New forum HATES videos (they are over whole post), please check the links (first is unfiltered, second filtered) .. also you have to copy/paste the link, they don't work yet:

https://youtu.be/Kq61i5oyZzA

https://youtu.be/GUKflK03D8I

EDIT: To follow up, the main reason for texture filtering is performance and visual quality. While you have to additionally compute with ray differentials, the performance by cache misses when reading pixels from high resolution texture (compared to reading neighboring pixels of low resolution one) is often a bigger hit for performance (this might give you quite a boost especially when computing ray tracing on CPU).

Additionally to this, you don't need redundant samples to filter the texture image (suppose you have just 1 spp, you will always have noise, temporal filtering would end up in flickering of those surfaces ... with mip mapping, you magically fix this problem too).

My current blog on programming, linux and stuff - http://gameprogrammerdiary.blogspot.com

Thanks! That is a nice example. Using a tent filter for the final subpixel samples resolution is indeed worth a try as JoeJ says, and will supposedly give sharper end results.

With "ray direction randomization", do you mean the subpixel area from which single rays are randomly shot from? (For example, 100 ssp with 0% randomization would shoot 100 rays all from the pixel center, while 100% randomization would shoot 100 rays chosen randomly in the whole pixel area)

0% would give sharp bul aliased results.

I meant a tent filter usually makes it more blurry, not less.

I used the tent filter to cover a larger area than the single pixel, with probability distributing more rays to the center to compensate. Result was maybe better image quality but more blurry than uniform distribution to the pixel square.

But remembering this experiment i thought you might accidently cover 2x2 pixels, which would explain why you think you are too blurry.

Vilems first images looks like uniform sampling single pixel area, and i would describe his textures as sharp. If it is worse for you there should be something wrong.

Found those two older images of mine - no textures but you can compare how the edges look. (Uniform pixel area, so still some aliasing which tent filter would help against.)


(... try again to post the images)

This topic is closed to new replies.

Advertisement