I want to create a scifi level with AAA quality in a reasonable time frame. I'm researching ways to create this specific style of textures and models:
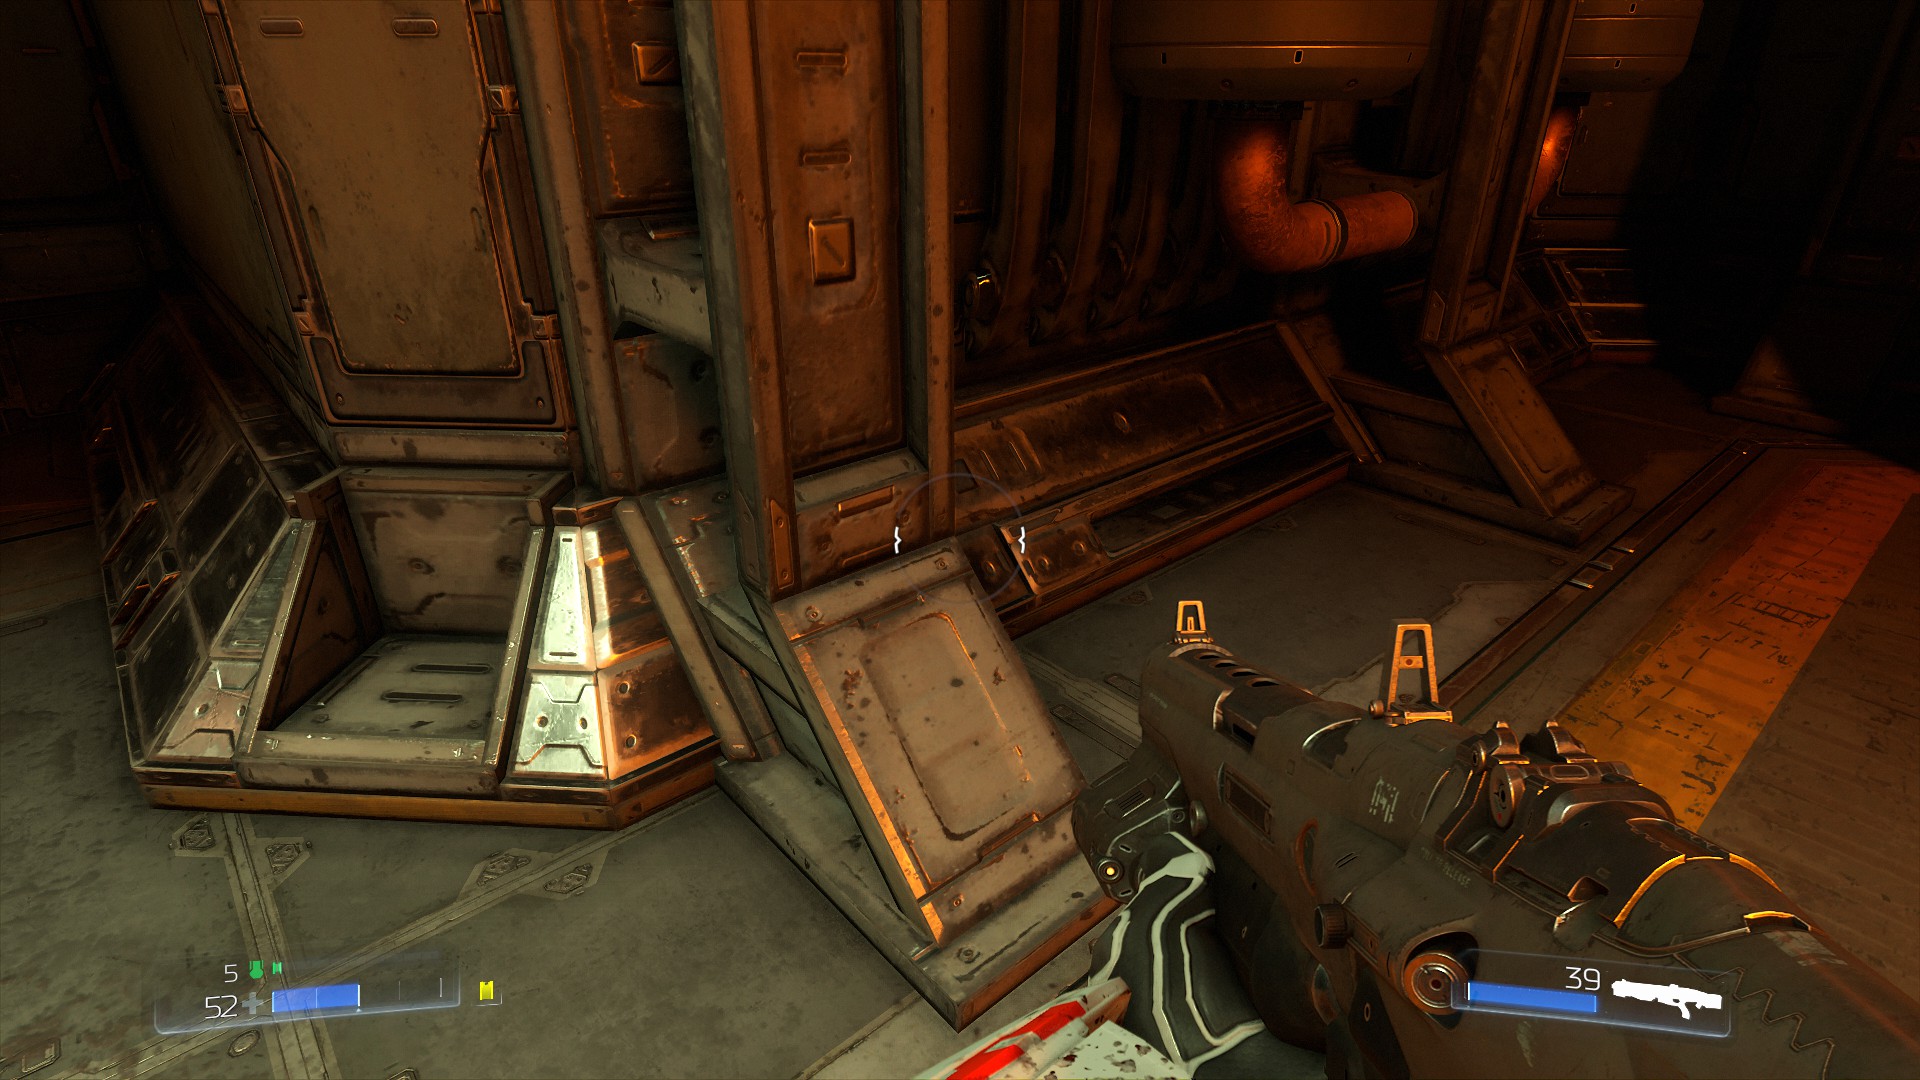
The 3D modeling is not so much a problem, but texturing this stuff is. What makes these look good is the wear and tear along the edges. Below may not be the best image, but I think it communicates the idea:
My question is, is there an efficient art pipeline and tool that can do exactly what I want? I'm guessing it would involve inputting an image that just has the different parts defined by a solid color, or maybe a vector image, and then you can easily and quickly add a background, some corrosion and wear around the edges, and maybe stamp some details on there, then output diffuse / normal / metal / roughness / ao? Sustance Painter is the only thing I know of that might do this, but if there is a simpler more focused tool I would consider using that. I can't remember, but I thought there was a photoshop plugin that did stuff like this? I'm really looking for a total solution with all the pre-made details ready to go, not a bunch of filters I can maybe hack together myself.
I would like to find a method where I can just setup some predefined styles and quickly process images in a few minutes, to produce a large volume of content efficiently.
My understanding is that models like that are usually created as a bunch of smaller parts that can be combined to create larger levels. Stuff like a wall piece, floor piece, corner piece, doorway, etc. Each part is then placed in the scene as a prefab with its own transform. I don't think it's very common these days to model entire scenes in one piece, it would just be too much work to achieve AAA detail.
Usually these pieces are modeled by hand by an artist, who also creates a material/texture maps, which might be shared with other pieces. I'm not sure exactly what tools are used to create the textures but I would guess it is a combination of photoshop and substance painter. I doubt you would find anything more specialized than that. Maybe there are plugins for those tools that do what you want. In any case it will probably require some skill and time to use and produce good quality results. A fully automated solution is unlikely.
To get AAA quality, you also need to generate matching normal, metalness, roughnesss, AO, and height maps. This can take a significant amount of work to get realistic looking materials. Often they are captured from the real world using photogrammetry. This involves taking many photos or video of a surface from different angles, using a tool like Reality Capture to generate a 3D mesh of the surface, then baking that mesh to height, normal, diffuse maps which are used in game.
The textures might also be baked versions of a high quality mesh, especially for the embossed parts. The artist could create a high resolution mesh with lots of small details, then that can be baked to a texture which is applied to a simpler mesh.
Generally this is a hard thing to do as a small developer. There's no easy or quick way to get AAA quality without the funds to hire artists to create content. In my own project, which is largely based on procedurally-generated terrain, I plan on hiring artists for the parts that require a human touch. They have the skills and can do it much faster/better than we could do in a reasonable amount of time.
Watch this, the Geometry Decals and Painting System chapters. Maybe it can give an idea of what they're doing related to texture “painting”, since you mentioned efficient art pipeline.
Josh Klint said: What makes these look good is the wear and tear along the edges.
Afaict it was Substance Painter which has made those worn edges so popular. Never used it myself, but i remember they had a particle system, blowing particles over the model to automate the affect. But can be brushed manually too. I guess they also had higher res models which they have baked down to low poly to get some of the normals.
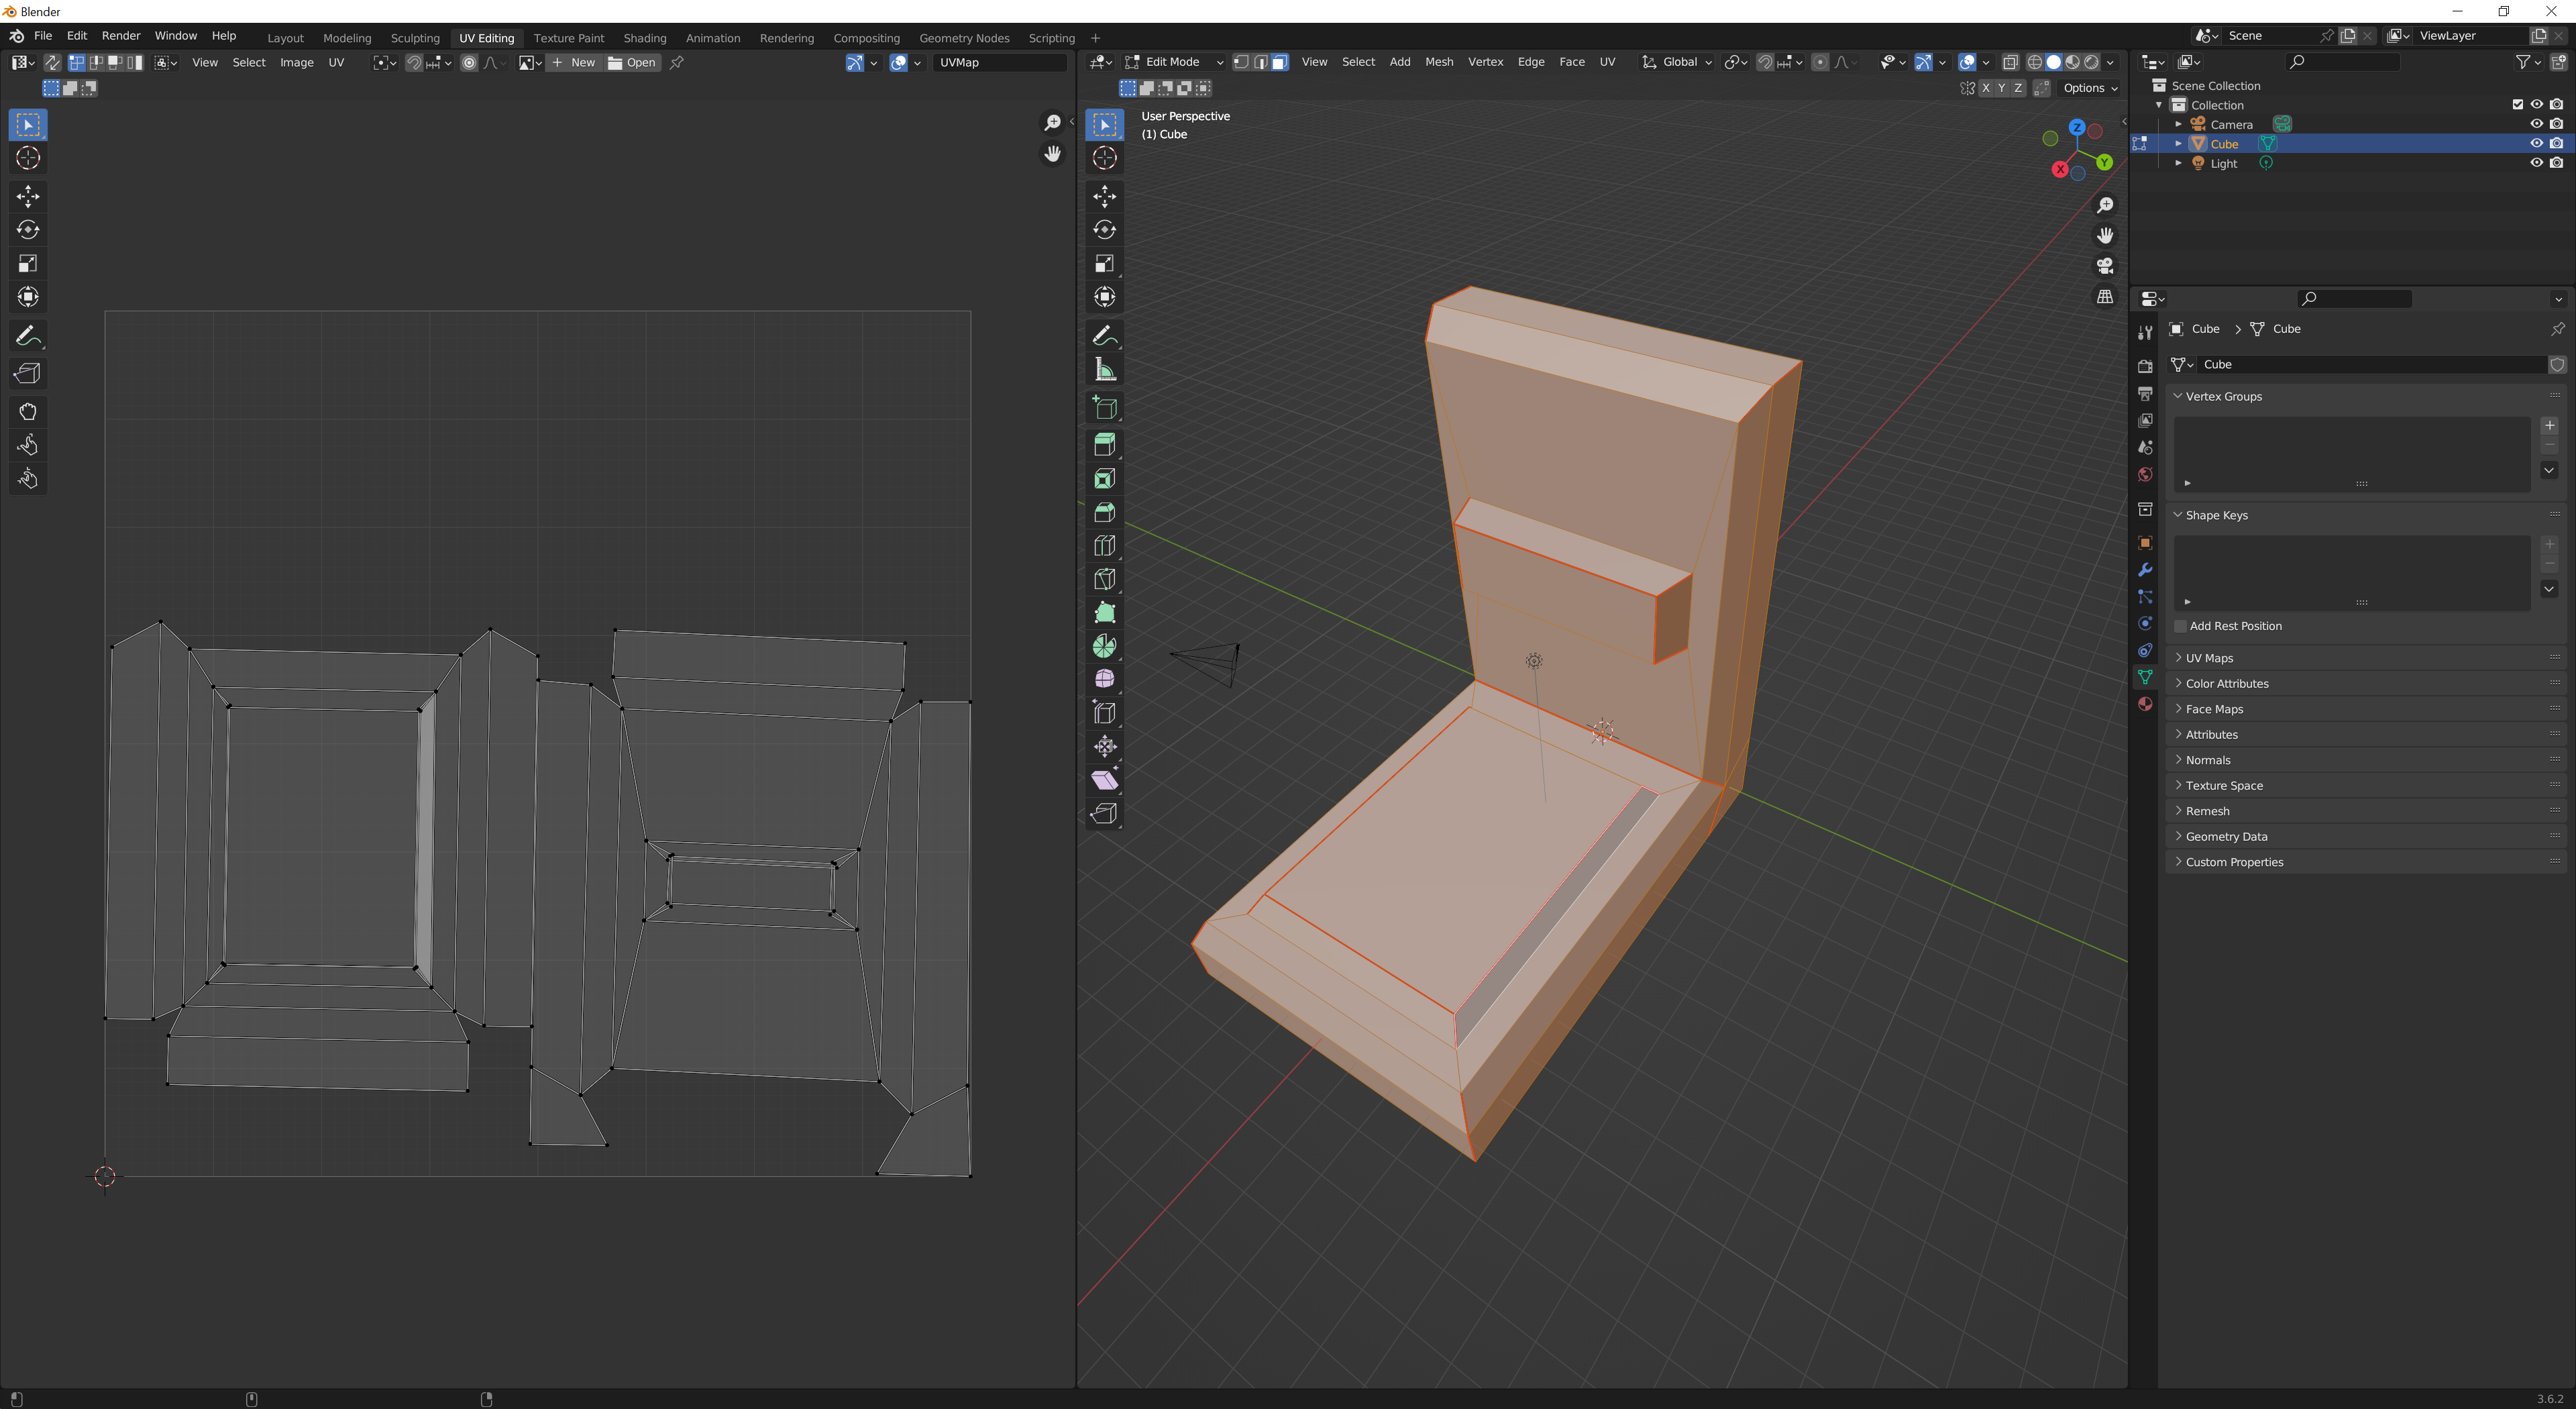
Process for these is to make modular elements (it's good to layout what elements you need, how big they should be - with a properly scaled boxes) - that way they fit to each other.
Then for each modular box you create actual geometrical model - the process isn't hard, mostly poly modelling and sculpting, I've put this quick one just with poly modelling to show an example (I didn't do sculpting or add details, had to do it within few minutes - as it's not going to be used anywhere else than in this post … also I didn't really bother with thinking about seams and UV - I just did it the way to have some reasonably packed UV):
So, now you have few options how to texture it. One of the ways is going into GIMP (or other software of your choice) and paint texture. I often do this for masks only (if necessary) these days … but if you really want, you can do it that way. It's just lengthy.
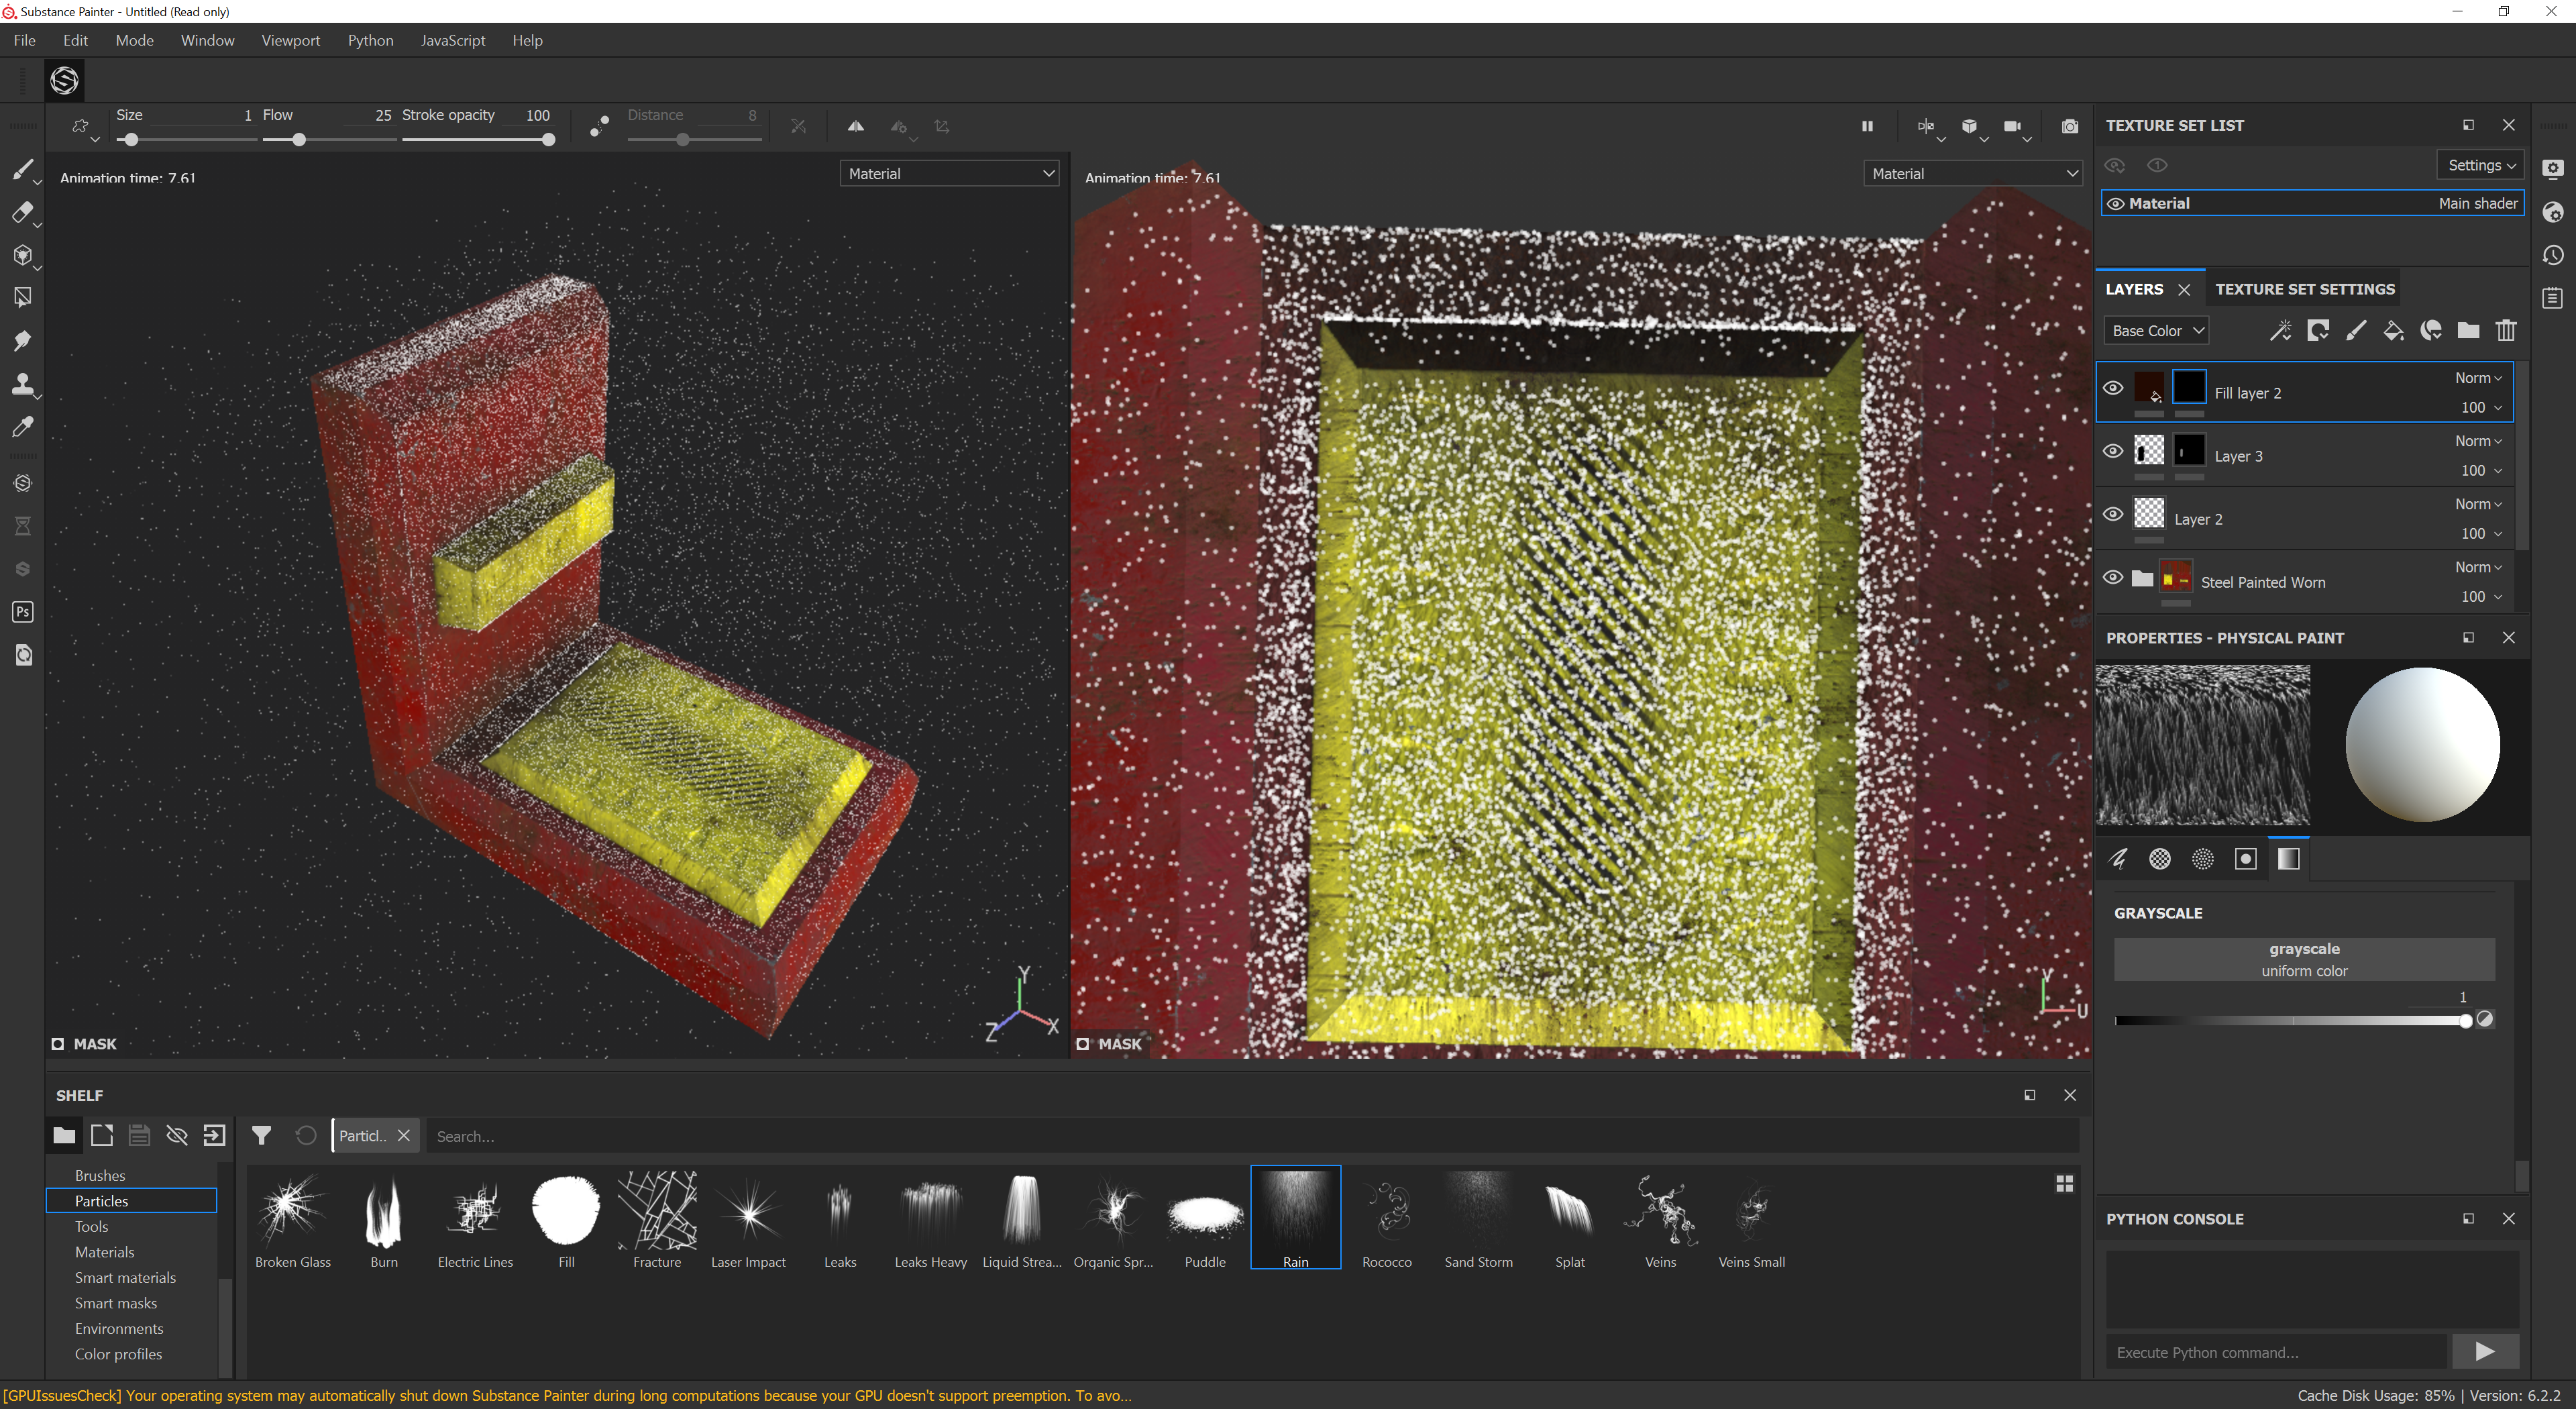
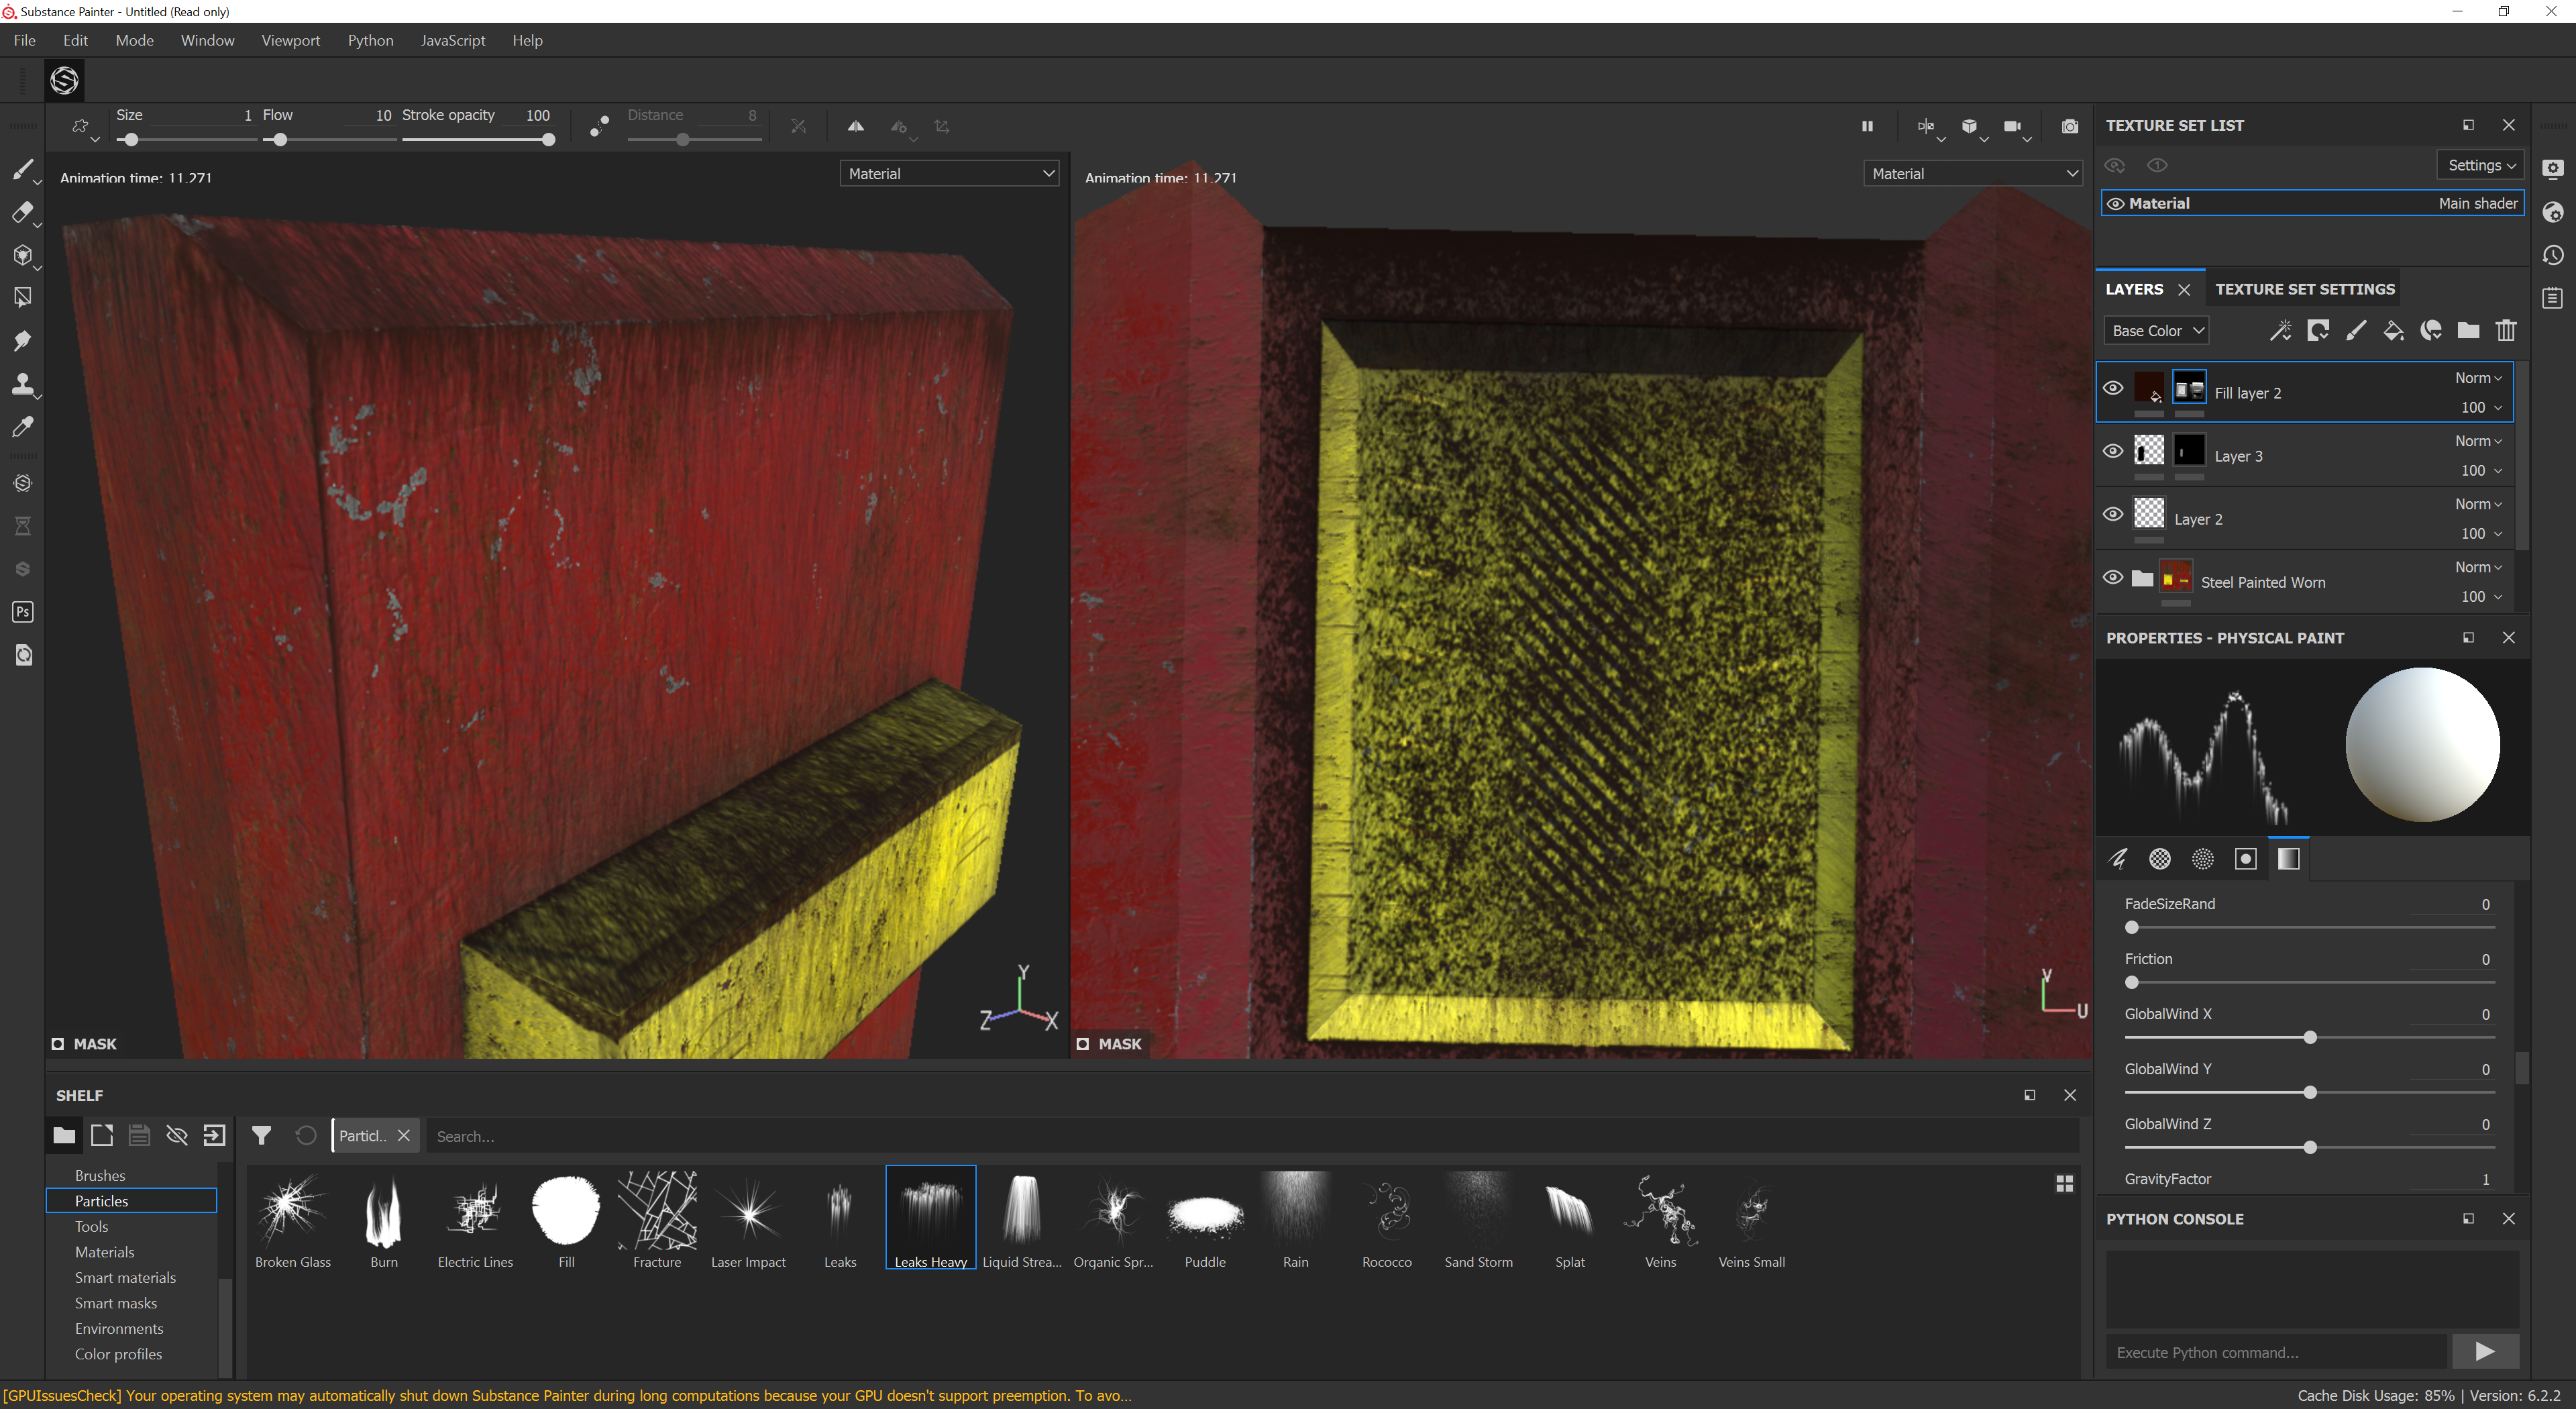
Another approach is having a library of various procedural materials from Substance Designer. Sometimes you can use them directly, but on objects like this - it's not enough (it's a good starting point). So - the approach using Substance Painter is to load this object in Substance Painter, generate mesh maps (which are positions, normals, etc.) and apply materials, masks, etc. You can hand paint something, you can add some procedural elements, etc. It's all up to you as a designer. During the paint (I just put a randomly picked smart material, used 2 colors a mask) you then have option to add additional layers - like the last one, which is basically just dark “rust” color.
For each layer, you can add a mask that affects it - on the next screenshot I'm generating a mask with rain particles (instead of hand painting it):
And as last - a close up of what the rain impact is (you cal clearly see where the “drops moved over” based on the rusty color.
You can apply similar approaches to work with edges, use layer masks in a bit more clever way, etc. It needs a bit of work, trial and error. The above is just to give you very rough idea how such things work (this is by no means any tutorial or such - or even producing anything of quality, I invested like 5 - 10 minutes into it).
…
So, what does Substance Painter do? It applies layers with various filters (some layers can impact normals only, while others just color, or everything (standard PBR layers are available on default - color, normals, metallic, roughness and height). Each layer is technically an image (either generated or painted) and it may or may not have a mask (determining where the layer is applied and how strong it is).
Layer masks can be painted or generated. Painting is done either with brush, by polygon, etc. Or with particles (it literally emits particles in 3D scene, simulates them and upon colliding with surface (or sliding) in given frame, calculates where in UV space they landed and modifies the painted image (or mask). And that's the “magic” that happens in there.
It is quite easy to use software (you view 2D and 3D texture all the time.
…
I'm not aware of similar software that is that easy to use. Downside is, they were bought by someone and only offer subscription model now (whereas in the past you could buy a lifetime proprietary license … which is why we all “love” Adobe).