
Crafting system in Luthier

Introduction
Right after finishing the Buff and Debuff system, I sent the game to a friend for testing. The first feedback I got was, "The crafting system is terrible." (I could use an emoji to hide my face right now) In this devlog, I’m going to tell you how I turned that "terrible" crafting system into something epic from scratch. Ready? Let's dive in!
Development
I hate crafting systems in most games. They’re usually something like, "If you want to make a sword, smelt 10 iron ores, get 2 refined iron, then combine those with polished wood and add 3 woven strings, ...." But why? The only thing I know about the psychology of game design is... I know nothing! But when I started making Luthier, I began with a simple crafting system. Recipes on the right, filters on top, and if you wanted to craft a guitar, it was the same old "smelt 10 iron ores, get 2 refined iron, add polished wood and craft with 3 strings…" Same boring stuff.
Every guitar had a fixed color and ability. At first, I thought, "This will work," but then it hit me: The main character is a Luthier! Players would want to craft their own custom guitars!
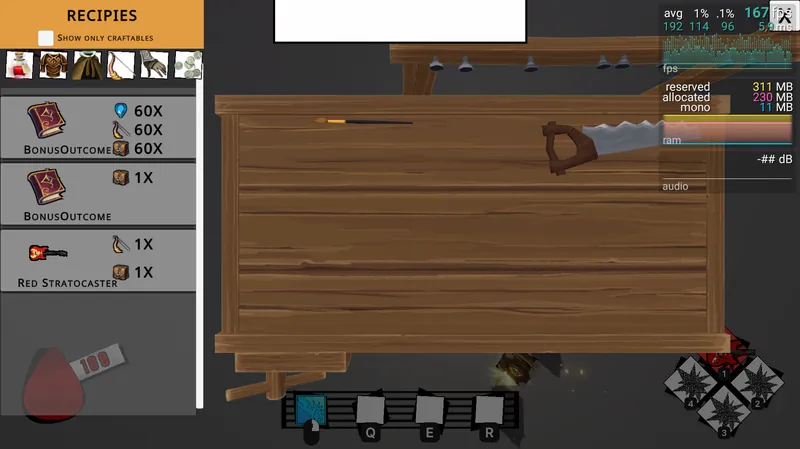
Now, here’s the problem. The inventory system, guitar usage system, and all that stuff I built earlier, they’re all done. And they consist of large chunks of code that I absolutely did not want to rewrite. But I had to improve the system. Here are the main issues I faced: Saving custom guitar icons, storing the abilities tied to parts, displaying everything correctly in the inventory and in the character's hands, connecting the visual systems, and loading data properly at the start of each game… (Deep sigh)
Let’s get started!
Hold on!
Just….
Check Out Luthier On Steam : https://store.steampowered.com/app/3052870/Luthier/
Technical Details
--3D
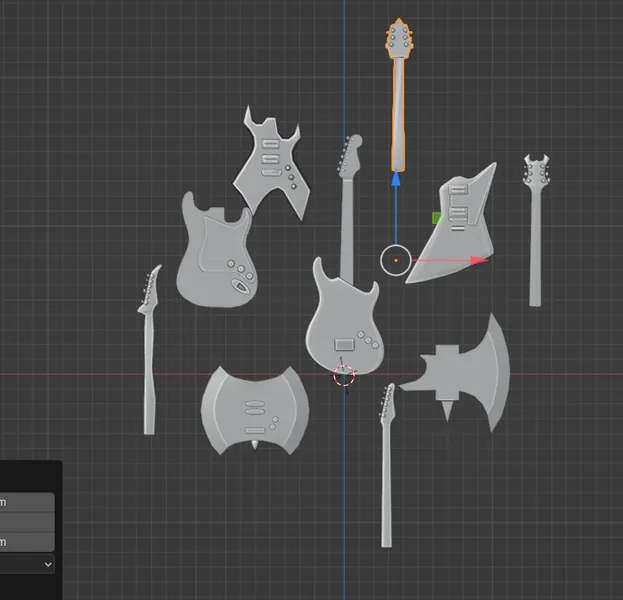
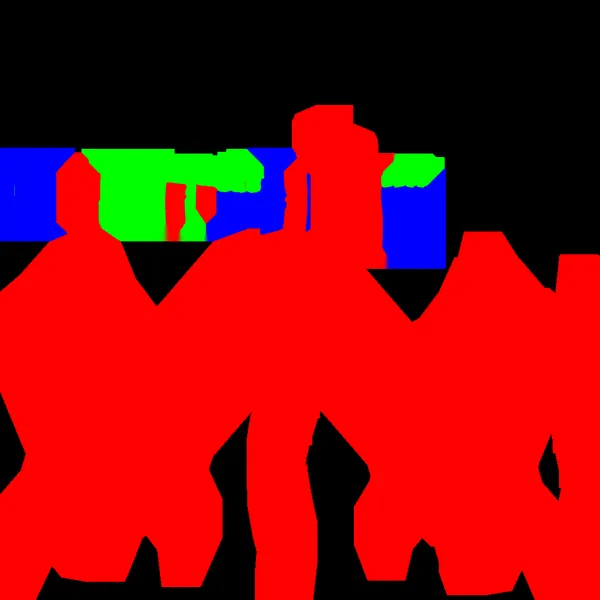
The first thing I did was break down the existing guitars in the game into parts, set their origins, and create ID maps. ID map is… well, I’m not entirely sure what it is, but here’s what I did: Each part needed to be recolorable, so I marked the main parts in red, secondary color areas in green, and the untouched areas in blue. The result? An ID map! We’ll use this later for the shader.
ID MAP
--Coding

There’s a Unity talk by Ryan Hipple where he discusses building a game architecture with Scriptable Objects. I also prefer to build all my systems around Scriptable Objects. The crafting system, colorings, and so on are all tied to Scriptable Objects. The basic idea is that I created Scriptable Objects to store the data for each part: main color, secondary color, power, speed, name, description, combat style... When you press a button, the corresponding part spawns, yada yada.
Now, let’s talk about the real issue. In Unity, if you’re changing the color of a material by grabbing it from the renderer and altering it, damn it! Every time you change the color, you’re actually creating a new material at runtime. That’s a risk I’m not willing to take. As the game grows, various optimization problems could arise. To solve this, I used MaterialPropertyBlock. This little buddy lets me set the desired color, and it only changes the color of the specific area I want, which it identifies from the ID maps. Want more info? Read the documentation, because I don’t have enough brain cells left to explain it.
--Shader
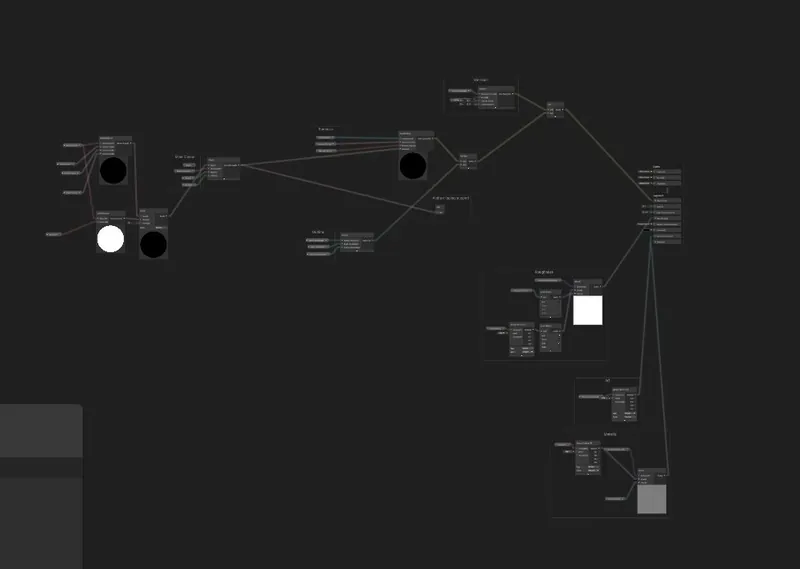
So you want to add abilities to your guitar? Yep, by adding things I call Cores to the guitars, you can grant them any ability you like. Fireballs? Lightning strikes? It’s all up to you. But as I mentioned earlier, using dual materials or adding extra meshes would be terrible for optimization, so I had to update the shader I was using. Remember, I was already recoloring the guitar using the ID map—main parts were red, secondary parts green. In Unity, I connected two sliders, saying "This is green, this is red," linked the main color and the pattern from the Core, and sent the results out. Boom! The shader I’m using is Unity’s toon shader, but even adding these little tweaks took me nearly a week. (Another deep sigh)
--In-Game
When you press the Craft button, a struct called "guitarData" is created. This struct gathers all the data related to the guitar—its parts, abilities, strengths, you name it. Then, to save an image of the guitar, I take a snapshot from a camera and add that to the struct. This generated file is then saved on the computer. Of course, I can’t just use this file in the inventory system as it is because they’re two different things. So, I take this file, create a copy of a Scriptable Object I made a long time ago called "InventoryItemSO," and inject the runtime-generated file into it. Now, we can use it in the inventory. At the start of the game, I go to the folder where these files are stored and create an InventoryItem from each saved file. I’m not sure if this is the most optimized way to do it, but I didn’t encounter any problems during testing. So, the crafting system is done!
Summary
Besides working on the crafting system, I also made a terrible gamejam game last month. Maybe I could’ve finished the crafting system faster if I hadn’t spent time on that, but it’s not a big deal—I reached the desired outcome, even if it was a bit late. Next up is the shop system. Moving on to a more painful and agonizing process!
Thanks for reading See you next time!
Discussion