GameDev.net gamedev.net
🔒 Locked

How is the 'Skyward Sword' impressionist art style done?

Started by brebarth221 Feb 1, 2024 at 1:33 PM 16 replies 16.3k views
Original Post
brebarth221
brebarth221
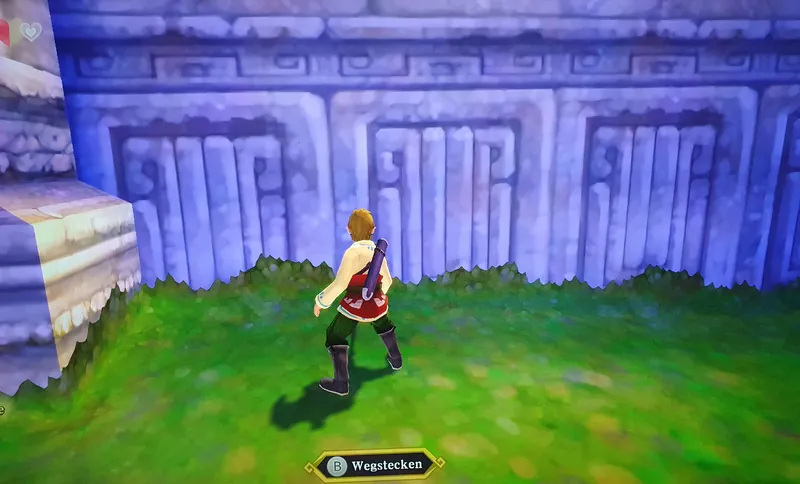
impressionist art style of The Legend of Zelda: Skyward Sword

How is this texture art style actually achieved? I'm talking about the painterly, slightly watercolor-like rock and grass textures. Some refer to it as impressionist, anyway it looks great.

Did they use special brushes in f.e. gimp? Or the smudge tool? Or any other tools or other software?

I'm basically looking for any tips or tutorials to help me achieve a similar style, preferably with gimp, but open to suggestions.

Thanks for any advice.

Aressera
Aressera

It looks like low resolution hand-painted textures with a heavy dither effect applied on top (not in texture).

brebarth221
brebarth221

>heavy dither effect

Yes! It could be some kind of filter applied to, I'm thinking a high resolution hand-painted texture.

I experimented in gimp and found that the 'oilify' filter might come close to how they did it for Skyward Sword.

But, it also looks as if they retouched by hand for high detail sections after the filter. For example the relatively high detail ornament carvings in the Skyward Sword stone walls look like they might not make it through such a filter and need retouching after the filter was applied.. maybe

so the process would then be:

1 make a high-resolution naturalistic image by hand

2 use oilify filter (or some other filter)

3 retouch by hand for high detail level areas

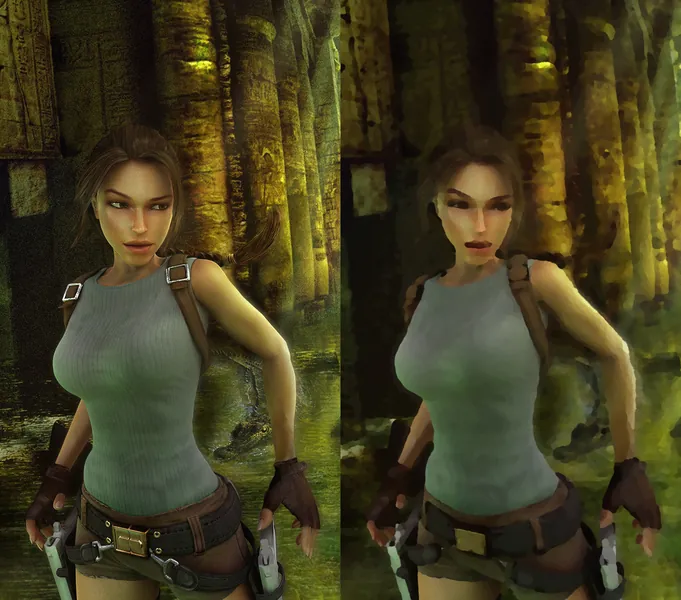
left: original hi-res, right: oilify filter
JoeJ
JoeJ

brebarth221 said:
anyway it looks great.

But it makes some problems worse: The low poly edges conflict with the style, and texture seams become easier to spot.

So i wonder: Do you want to apply this just to the textures, or do you want to make a post process filter applied to each frame, so it looks like the Tomb Raider image and avoids the problems i've mentioned?

If it's the former, your already happy i guess. But for the latter i could try to come up with some specultaions… From Photoshp i remember there likely is some dilation going on. Likely darker colors win over brighter ones, but there is some thresholding on detected edges too i guess. Whatever, it's surely doable for realtime and would be some new look.

Aressera
Aressera

brebarth221 said:
left: original hi-res, right: oilify filter

The “oilify” filter looks like a median filter. Not easy to implement efficiently.

brebarth221
brebarth221

@JoeJ I was thinking of baking it to texture, preferably. I can see the seams problem, but it didn't distract me all that much while playing Skyward Sword (assuming here that they have everything pre-baked). For now I'll take the path of off-loading as much as possible to pre-runtime.

JoeJ said:

If it's the former, your already happy i guess.

well, having to re-touch by hand after filtering is not great. So if you have any ideas of how to get away from that, I'm all ears.

Aressera
Aressera

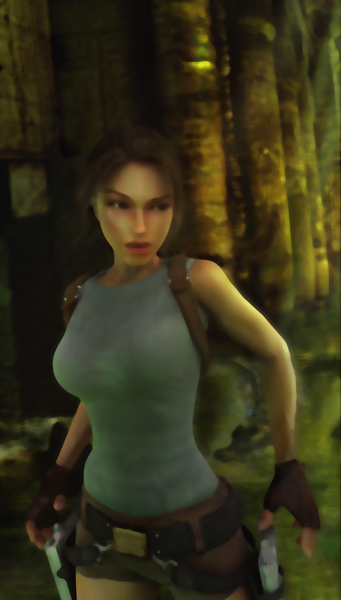
For comparison, here is the tomb raider image passed through a median filter code I have written, with 10px filter radius. It took 19 seconds to process this image using 1 thread, though my code is using a naive algorithm and it could be much faster.

brebarth221
brebarth221

Aressera said:

For comparison, here is the tomb raider image passed through a median filter code I have written, with 10px filter radius.

It seems to preserve edges and perhaps details a little better. Is your implementation for cpu or gpu?

Aressera
Aressera

brebarth221 said:
It seems to preserve edges and perhaps details a little better. Is your implementation for cpu or gpu?

It's a CPU implementation. It's slow because it sorts all 20x20 values to find the median for each pixel. There are faster ways that use histograms and spatial coherence but I haven't implemented those (mostly because they don't work well for floating point data). It would probably be possible to write a GPU implementation that uses histograms but I haven't done this so I can't say how fast it would be. Photoshop probably uses a histogram+compute shader approach if I was to guess, to make it fast.

JoeJ
JoeJ

brebarth221 said:
well, having to re-touch by hand after filtering is not great. So if you have any ideas of how to get away from that, I'm all ears.

Some example workflow i might have used when i worked as an artist…

Photoshop has a built in tool to record steps to automate them, called ‘Actions’.
For your given steps:

2 use oilify filter (or some other filter)

3 retouch by hand for high detail level areas

The process would be something like:
Do edge detection, plus eventually detect bright features which actually get lost, and use the result as a mask.
Do one ‘oilify’ pass over the image using a larger filter filter kernel.
Do a second pass using a small kernel (assuming it preserves the details).
Blend the two results using the mask.

Using actions, you could do all this just once to record the action, then you could apply the action to all images in a given folder to a batch process them all while drinking a coffee.

If Gimp lacks such automation feature, it might be worth to consider Photoshop. Idk if Adobe currently offers free trials for their software, and it surely requires some time to figure all this out, and then it takes even more time to decide if automation is worth it at all or if you end up doing a lot of manual retouche anyway.

Personally i have use the actions feature quite rarely in practice. But sometimes it was a god sent.

Maybe Photoshop also offers higher quality filters. I remember ‘water paper’ or ‘sponge’ for the filter names. I had used this a lot. But hard to say. The Gimp results really look similar and good as well.

Aressera said:
The “oilify” filter looks like a median filter. Not easy to implement efficiently.

Nah, it's not really that either. Median does not give a painterly effect. It tries to smooth out outliers while preserving edges. I have used it to make human skin smoother, eliminating wrinkles and such stuff. And ofc. to fix noise or faults in the image.

The painterly filter here creates blotches, so some segmentation. It's not smooth but actually turns smooth gradients into discontinuities.
Iirc, this was already in Photoshop when it run on 60 MHz Motorla CPUs, and it was pretty fast even back then. I remember artifacts from single pixels becoming those typical larger squares with rounded corners, but not forming proper circles. So i guess the filter is simple but involves multiple passes.
But not sure about anything. I may confuse this filter with others and remember some things wrong.
Following the first two decades of progress in Photoshop, it was interesting that those classic filters never changed. I assumed they still used the initial code and never needed to update it. So i would wonder if they have been ported to GPU, but maybe they did this more recently.

a light breeze
a light breeze

No need for texture filtering. Just paint with actual watercolors on actual paper, scan in the result, and use as texture.

brebarth221
brebarth221

JoeJ said:
Photoshop has a built in tool to record steps to automate them, called ‘Actions’.

this made me think about command line tools such as imagemagick. It seems to support a good amount of artistic filter options. Also an oilify filter.

More command line equals more coffee, to the point of shaky coffee fingers.

JoeJ
JoeJ

brebarth221 said:
this made me think about command line tools such as imagemagick.

Yeah, i remember this. Good idea i guess. If you really have lots of textures to process, writing some code to apply some chain of filters surely is easier to maintain than Photoshop actions. Somehow i have always lost those actions, or they stopped working.

a light breeze said:
No need for texture filtering. Just paint with actual watercolors on actual paper, scan in the result, and use as texture.

Reminds me on my mother saying: ‘No need to play computer games, kid. Go outside and play some real soccer!' :D

brebarth221
brebarth221

a light breeze said:

Just paint with actual watercolors on actual paper, scan in the result, and use as texture.

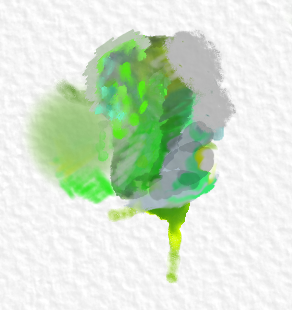
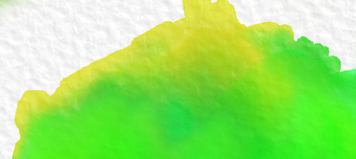
actually this made me go through my older purchases. I remembered that I still have an older version of Rebelle lying around, which supports watercolor fluid and oil color simulation. This way I get to have undo / redo.

It'll take some time to learn, but a first dabble looks promising.

taby
taby

For the record, I see no reason to refer to these images as impressionist. Dots like that are referred to as pointillism, which is a post-impressionist movement.

Impressionism's goal is to capture fleeting atmospheric lighting effects, like the Sun through fog on water.

Pointillism's goal is to capture richer, more vibrant colours by placing dots of pure colour next to each other, rather than mix them on the palette. The trick with pointillism is to be far enough away that you can't make out the dots.

Impressionism and pointillism are not necessarily the same thing.

GuardHei
GuardHei

I actually tried to replicate the filter several months ago. Thing is – textuers themselves were not anything magical, these were just painted with a water color style.

However, they do have a depth of field effect, that renders distant background objects in Pointillism style. This is achieved through a traditional gather as scatter bokeh effect, but using brightness to weight each sample.

I have achieved something similar in Unity which you can check out: 塞尔达传说:御天之剑的油画效果和复刻_哔哩哔哩bilibili_塞尔达传说 (skip to 1:30 for result comparsion)

It's not the exact way how SS achieved given the limited hardware feature of Wii, but the core idea is fairly similar.

brebarth221
brebarth221

GuardHei said:
they do have a depth of field effect, that renders distant background objects in Pointillism style.

Nice work!

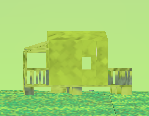
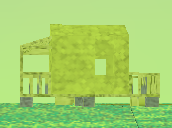
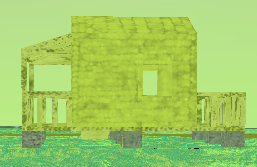
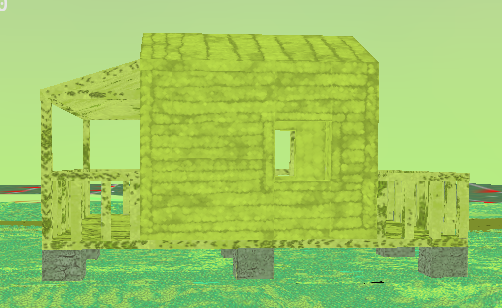
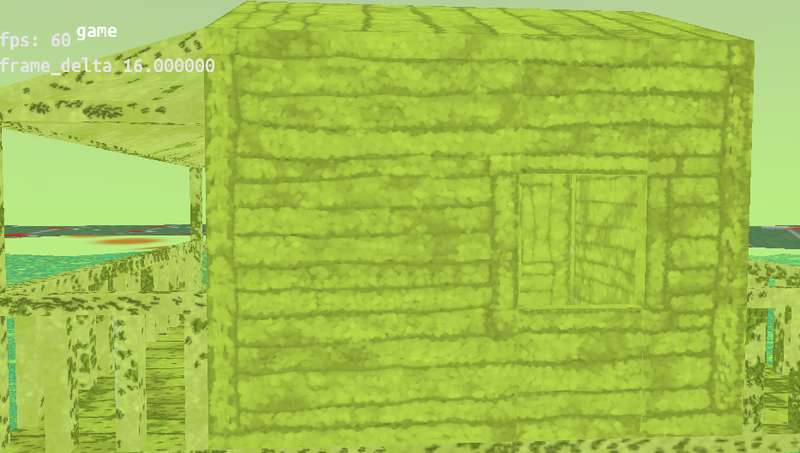
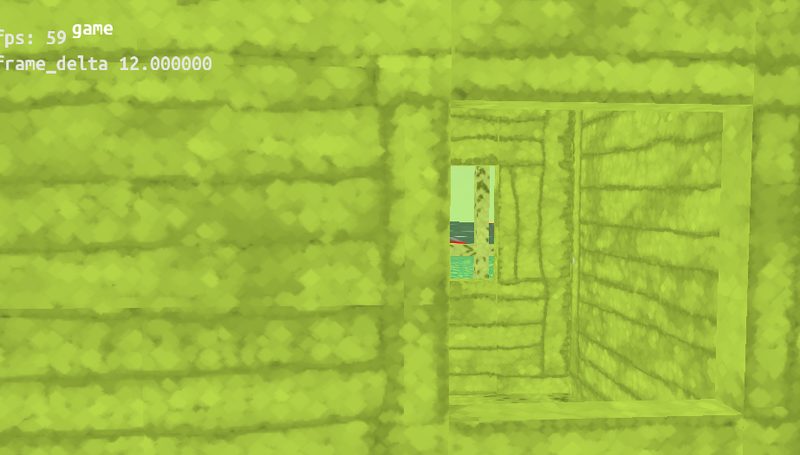
There is another way to do this. Instead of using the shader, it's possible to save MIP versions of the textures and run a filter (here I've used diamond dilation) over each mip level file seperately. (This requires a non-standard or custom way of working with mip-levels however.)

The effect is that each mip level has it's own pointilism, at it's own level of detail. I did this for one of my textures here (The wall texture only. Ignore the veranda and all other textures)

But, as has been said before: it will have seams showing.

pointilism at various MIP levels

Topic Locked

This topic has been locked by a moderator. New replies are not allowed.

Sign in to reply to this topic.