
Building an In-Game Store for the First Time? Here are the 4 Keys to Success
So you have a great concept for a mobile game and you have heard that free games with in app purchase is the way to go but you are not sure where to start. Guess what? You are not alone and many are struggling with this challenge. Here are 4 golden tips.

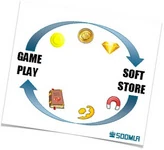
- Put the store where users can find it and make it a natural part of the game loop
- Create items that players use in your game every day
- Make the store experience an interesting one
- Use "Waiting Mechanics"
- Balance Virtual Goods' Capabilites and Prices
Put the Store Entrance Where Users Are
Getting users to naturally enter the store as part of the game flow is very important. Let's check a few methods for achieving this. If your game has levels, it should be easy enough for you to add a button to the store from the screen that notifies the user about a successful level completion. Is your game a 'survival mode' type game or an 'endless runner'? No problem. These games have limited sessions that usually end with a summary screen. This will be the right place to put your store button. Designing other types of games? If you implement the 4th tip you would actually break the game into sessions and would be able to use the session end screen. Alternatively, you can add the store button to screens that notify the user about achievements. You can also use virtual goods that require users to activate or equip them and use the store as the interface for picking the active character/vehicle/weapon. This will help you get users to the store more frequently.Add Items that Players Need Regularly
Ok, so the store is now accessible from every screen in the game but why would a user want to enter it? Let's think about the real world. The store that we enter the most is the one that sells the product we use and consume every day. Let's create some goods like that and make them easy to buy with game coins. How easy? The user should be able to collect enough coins in 1-3 levels or a few minutes of game play. The item itself should be regularly consumed and make it easier for the user to collect more coins. If you do this correctly you end up with a consumption loop that brings the users to the store almost every time they play the game. Here is how to make an effective regular use item:- Make it complement the game store (bananas for a monkey, fuel for a car, ...)
- Price it so that users can earn enough to buy it within a few minutes of game play
- Create an item that is fun to use and makes the game more engaging
- Give the item powers that will make earning coins easier
Design an Engaging Store
You should also give the user reasons to spend time in your In-App Purchase store. Think of ways to make the store engaging and interesting for a long time - extend the variety, add some mystery and try to keep it fresh. If you want to look at a good example of store variety - look at CSR racing. That store has over 2 million items you can buy. You can also add mystery by using silhouettes to hide an item until the right time has come. This helps in keeping the user engaged and curious about what the store has to offer. The last bit is to keep your store fresh by adding items, unlocking items and even featuring seasonal items and limited editions.Add "Waiting Mechanics"
If you want to really play it like the pros, you need to limit the user's ability to play continuosly and add short breaks. This is a bit tricky so you will need to approach this carefully and make sure not to annoy your users. The best way to do it is by experimenting with different levels of limitations and measuring the impact on users until you reach the sweet spot. If you do choose to explore this direction, you should design a resource that is consumed naturally in gameplay and automatically adds up as time goes by. Candy Crush Saga has 'lifes' and in other games you can see fuel or energy. When the user runs out, she can choose to do one of three things: buy more, stop playing and come back later or wait inside the game. If you followed the rest of the advice, the option of staying inside the game and visiting the store should be a likely choice for a user who wants to kill some time.Balancing Prices, Capabilities and the Game Difficulty
Imagine the following scenario - a user pays a dollar to buy something and now the game becomes too easy and he looses interest. This is a bad experience for the user and it's also bad for business. Users often pay on impulse but they wake up the next day and if they don't see the value they are not going to like it. The paradox is that the impulse buy is often to make things easier but at the end of the day the user will want the game to still be challanging. How do you do that? There are a few ways around it but before we dive into them it's important to understand that balancing requires a great deal of fine-tunning which means repeatedly measuring and adjusting until the criteria is reached. You will need to integrate an analytics tool or use a store platform that has analytics built in. So back to the paradox:- Method 1 - Make it steep If the difficulty curve is steep enough and the item's impact is limited the player might skip ahead a few levels but will soon reach a bigger challange.
- Method 2 - Randomize it Giving luck a role in overcoming the challenge will limit any virtual good ability. Dungeons and Dragons, American Football and Soccer are just a few examples of great games where chance plays a role and even an inferior opponent can win at any given day. This is part of what makes them so great.
- Method 3 - Items that Consume Resources If you followed the second advice in this article you already have something that the player consumes regularly (let's call them resources). If you design the other virtual goods in the game to always consume resources you are limiting the users ability to use them to much. A machine gun might get you more fire power than a pistol and will win any batlle UNLESS the user needs to buy the bullets as well. Not much you can do with a machine gun if you only have 5 bullets.
Related Tutorials

Lesson 1 — What C# Actually Is
Why is C# the language driving the production of thousands of indie games using Unity and custom engines all around the…

Steps to Make a Simple Game in Unity
if you’re diving into game development, Flappy Bird is basically the ‘hello world‘ of the gaming universe. It is the ul…
.webp)
Automatic Tutorial Creation for Unity | No AI | No more time waste
Automatic Tutorial Maker (ATM) for Unity is a tool that automates in-game tutorial creation by recording developer acti…
Save and Load System for Godot 4 – Tutorial
Saving and loading game data is a crucial feature for any game, as it allows players to continue their progress even af…
 FreeTimeDev

Unity Finite State Machine Tutorial
Comprehensive tutorial on utilizing finite state machines (FSMs) in Unity game development. It explains the concept of …

Project Structure - Guide to Cocos Cyberpunk Source Code
In my previous post, I mentioned that I would be write a series of articles on Cocos Cyberpunk. So let's kick off with …
 Mr. Kylin
Discussion