
MaPZone Tutorial
A quick guide showing how to create high-quality textures from procedural patterns using MaPZone 2.5
This tutorial will guide you through the creation of a complete "Lava stream" material using MaPZone 2.5. First of all, here is what you need to know before getting started. For this tutorial, I'll assume you already looked at the interface and the presets that come with MaPZone. The tutorial is quite detailed but I encourage you to experiment with your own settings and find what you like best once you understand how the tool works.
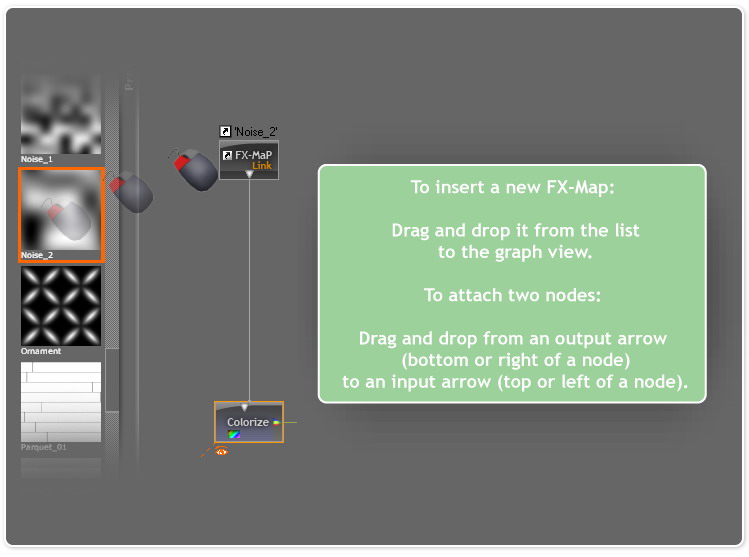
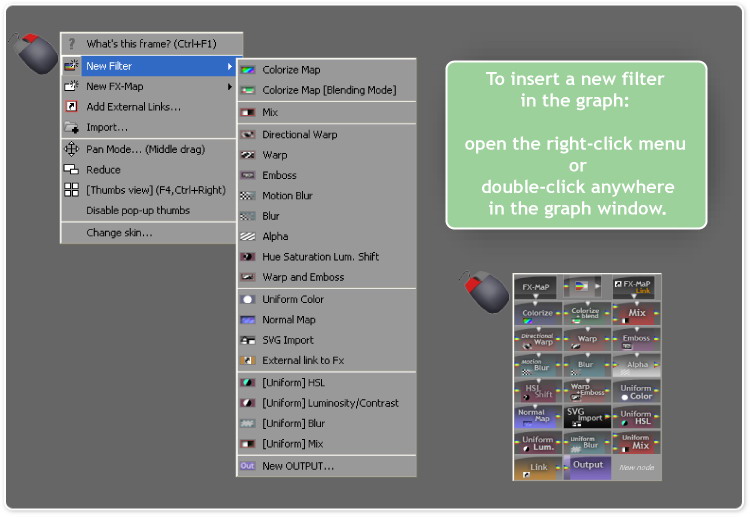
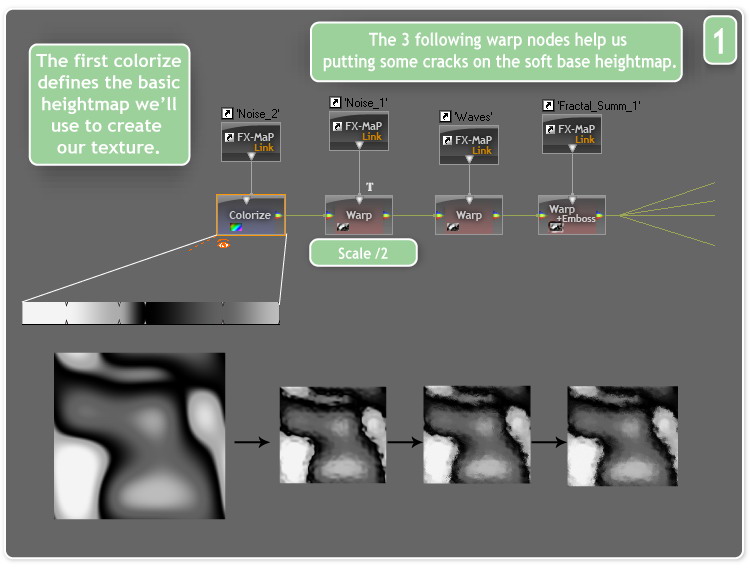
We will start this tutorial by creating a basic heightmap that will drive every other map of our material. The FX-Map I chose is a default low frequency noise that comes with the default MaPZone library. In the first node gradient, flows of lava are indicated by darker areas and solid rock is indicated by lighter areas. You can change the aspect of light and dark areas by tweaking the gradient defined for this node (the gradient is located at the bottom of the graph window). As a general rule, the visual aspect of most nodes can be modified through the gradient.
The "T" on top of some nodes indicates a transformation. You can access the transformation panel by double-clicking on the white triangle on top of each node. The Scale informations given on the pictures of this tutorial indicates what transformation should be applied to the node.
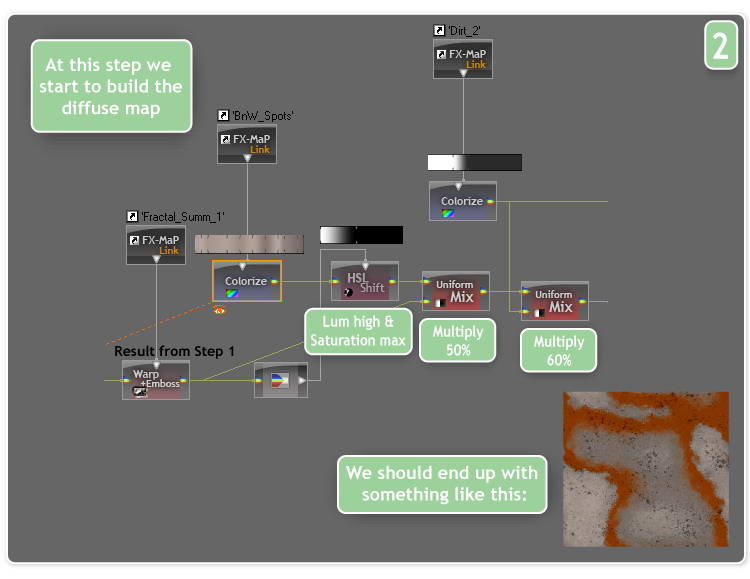
Now, starting from our heightmap, we create a base for the color map : 2 new FX-Maps noises (BnW_Spots & Dirt_2) are mixed here to add holes in the rock. For each Colorize+Blend or Mix filter, you can choose between multiple blending modes : Normal, Multiply, Add, Substract, etc.
The HSL Shift node allows us to saturate the beige rock color only in the streams using our heightmap as a mask.
Again, starting from the same point, we use a little trick to deal with the "edges" of the heightmap: 2 Emboss filters with oposite lighting, multiplied with each other. Then we can multiply the result with the diffuse.
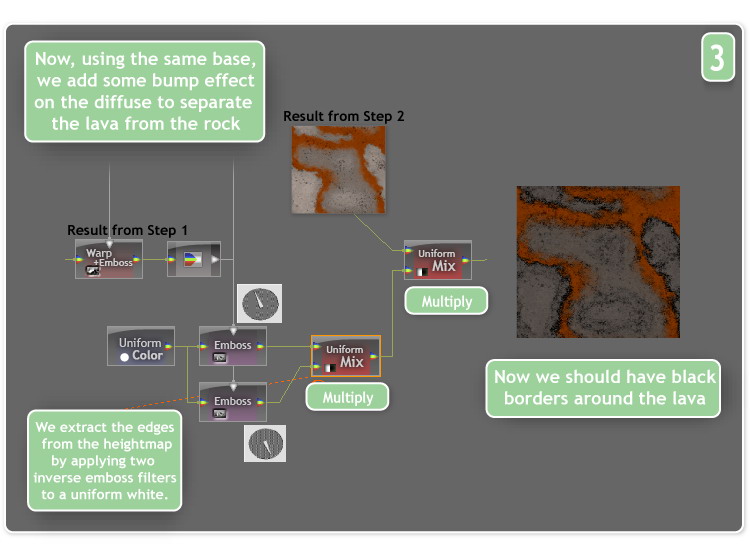
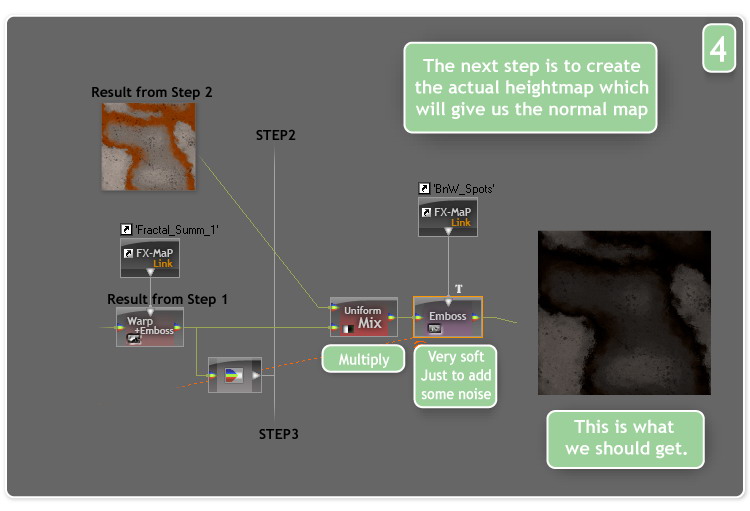
Now let's go back to our heightmap. We multiply it with our basic diffuse from Step 2 and apply a soft Emboss filter to add some noise. Our heightmap is ready. You can already plug it into a normal map filter and an output to see the result in the 3D preview. To open the preview window, click on the little arrow just under the FX-Map list on the left. You can then apply your normal map on the 3D object by selecting the output node and clicking on the orange arrow on the bottom center of the screen.
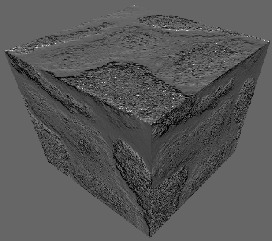
Here is what you should get in the 3D Preview:
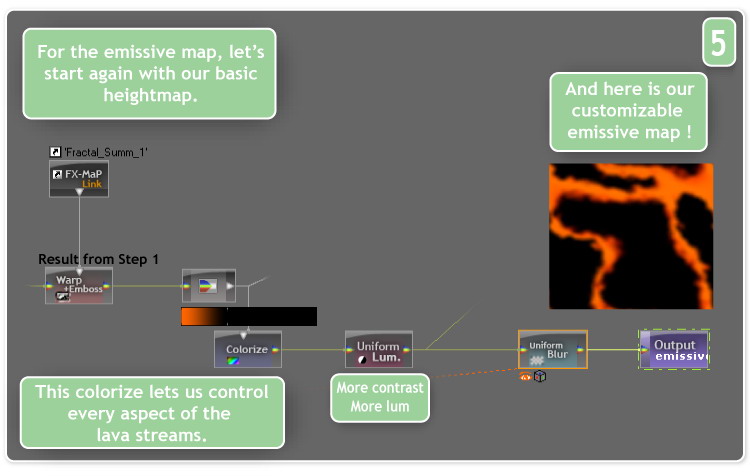
Now, let's create the emissive map for the lava. Starting again from our heightmap from Step 1, we re-colorize it in orange, replacing the black, and black replacing the grey (see gradient). This colorize node is very important. By adjusting its gradient you will be able to raise the level of lava on the final material, or even change the color to a bright green if you want toxic waste instead of melting rocks. We then raise the contrast to create a redish color on the side of the lava streams. Finally, you can blur as you like to simulate a bloom effect.
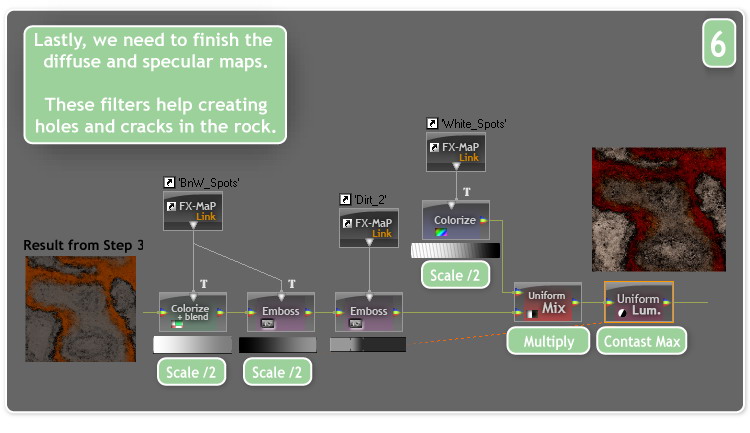
Let's go back to our diffuse where we left it at Step 3. We continue to add spots and speckles along the way using some Colorize+Blend and Emboss filters. After adjusting the contrast at the end, we should have something that starts looking like volcanic rocks and lava.
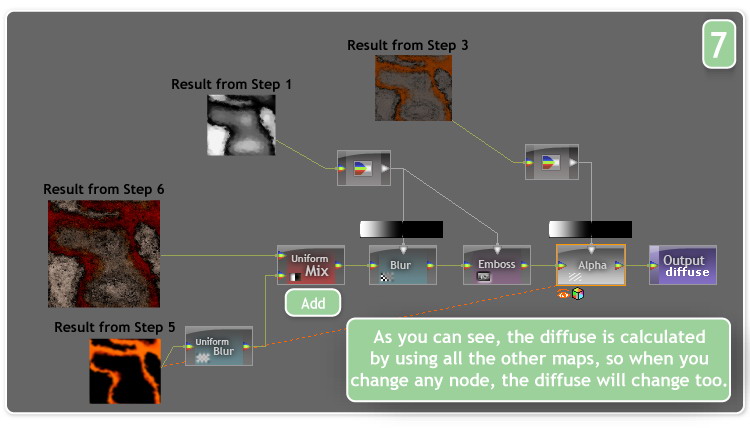
We now need to finish the diffuse. First, we add the emissive map to the diffuse to strenghten its effect. Next we blur the diffuse using the heightmap from step 1 as a mask, so only the dark parts (the lava) is blured. A little emboss to get harder edges between the rocks and the lava and finally, we use the result from Step 3 as a specular map: in MaPZone, the specular is stored in the diffuse alpha channel so we use an alpha filter to create the alpha channel of the final output image.
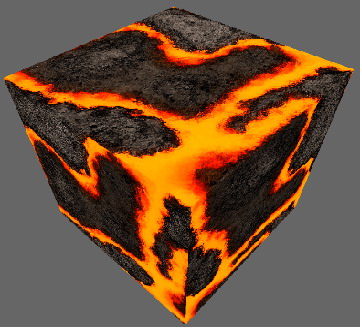
You should get a result close to this in the 3D Preview:
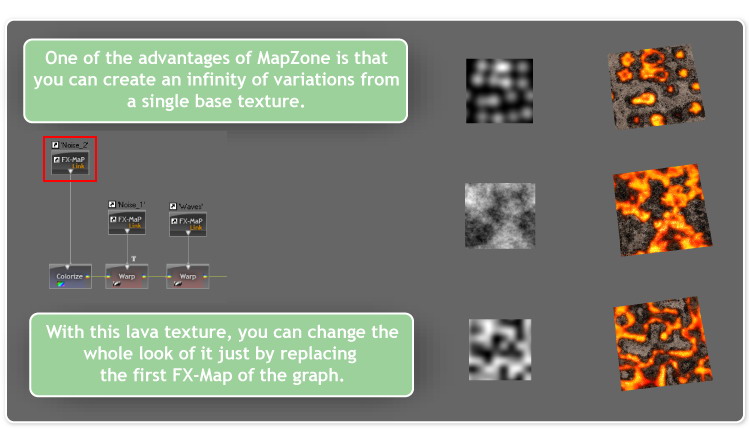
Now is when you can really see one of the great advantages of MaPZone in action: just by modifying or replacing the very first FX-Map, you can change the whole look of the texture. Do not hesitate to experiment changing other parameters too, and have fun!
Related Tutorials
Why Animation and Cinematics Matter in Horror Games
Learn how animation and cinematics can become part of gameplay in horror games by teaching mechanics, creating vulnerab…
 huseyin_onur
Designing Horror Games Inspired by Real-Life Experiences
Learn how real-life experiences can inspire more authentic horror stories, stronger emotional connections, and memorabl…
huseyin_onur
Balancing Game Development and Creative Direction in Indie Production
A practical look at how indie developers can balance creative direction with hands-on game development. This article co…
huseyin_onur
My Unreal Engine Development Process: From Core Idea to Playable Build
A practical overview of my Unreal Engine development process, covering how I move from a core game idea to a playable b…
huseyin_onur

Introducing LaneGraph: The Ultimate Road Network Solution for Unity
Discover the power of LaneGraph, a lightweight and flexible lane-based navigation system for Unity. LaneGraph makes it…
Retargeting Mixamo Characters with Root Motion In Unreal Engine 5.4.
I have always found Retargeting Mixamo Characters To have Root Motion is a serious lengthy Tast, Recently I stumbled up…
Discussion
More from Jérémie Noguer
Comparing Shadow Mapping Techniques with Shadow Explorer
New Incentives and a Whole New Platform From The Intel AppUp developer program
The final installment in this series on Intel's AppUp program details additional incentives and opportunities for devel…
The Game Maker
This book excerpt contains the first chapter of the book that introduces beginning game developers to the Game Maker pr…
Discussion