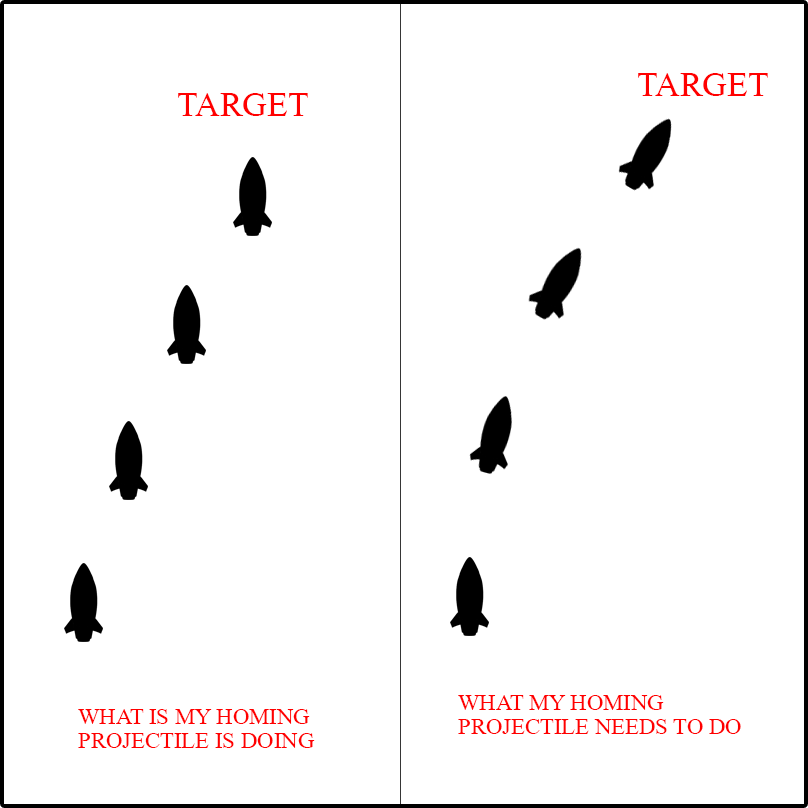
This article provides a brief introduction to creating Homing Missiles in a 2D game. A Homing Missile is a missile that locks onto and chases a target until it reaches the target and explodes. We'll be using the Unity engine, and a script for the Homing missile is also included and explained in the article.
Scene Setup
- Create two 2D Objects named “Missile ” and “Target”
- Add a sprite to these 2D Objects (You can download the project from below link)
- Add rigidBody 2D in missile and add Script also name it as ”Homing Missile”
Implementation
To implement a basic homing missile we could use MoveToward/Lerp until the missile reaches its target.
Using MoveToward/Lerp, the missiong will reach the target properly, but its movement will be very linear - there is no feel of a homing missile.
To implement a better feel, we need to simulate with better physics. Let's walk through a solution:
    public class HomingMissile : MonoBehaviour
    {
        public Transform target;
        public Rigidbody2D rigidBody;
        public float angleChangingSpeed;
        public float movementSpeed;

        void FixedUpdate()
        {
            Vector2 direction = (Vector2)target.position - rb.position;
            direction.Normalize ();
            float rotateAmount = Vector3.Cross (direction, transform.up).z;
            rigidBody.angularVelocity = -angleChangingSpeed * rotateAmount;
            rigidBody.velocity = transform.up * movementSpeed;
        }
    }
Variables
- rigidBody: rigidBody of the missile to add velocity and change angle.
- target: To get the position of the Target.
- angleChangingSpeed: The speed to change the angle
- movementSpeed: Speed of movement
The Math
Here is a visualization of the path our homing missile needs to take on a moving target.
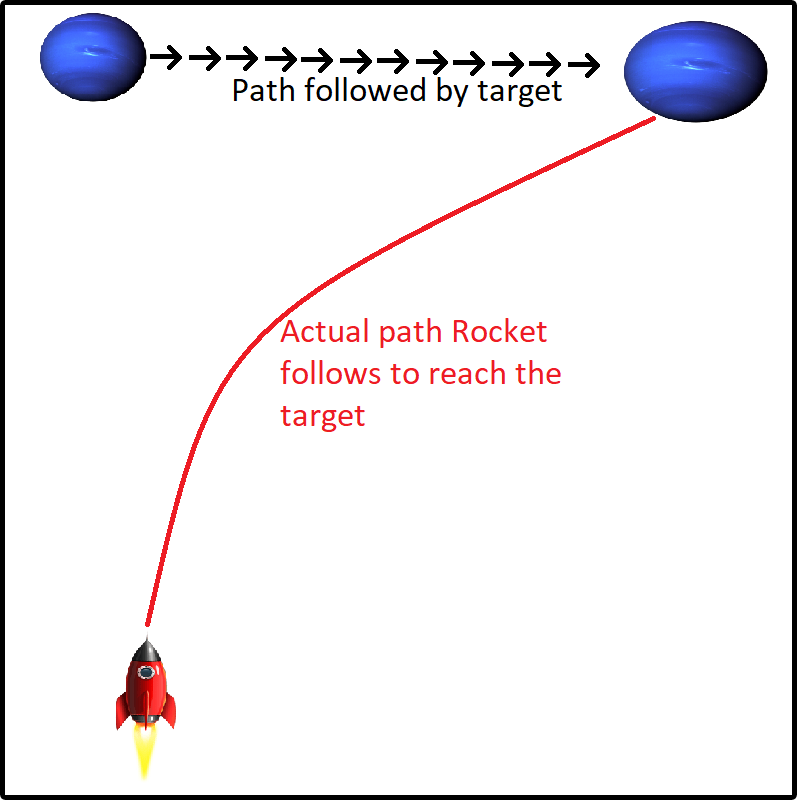
Let's talk about how to implement this.
First, you need “Direction”.
Step 1
We subtract the two vectors, targetPosition and missilePosition to get the direction.
direction= targetPosition (target.position) - missilePosition(rb.position);
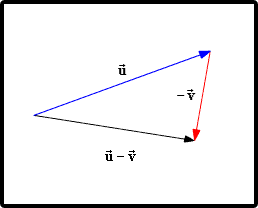
Step 2
We convert the direction vector to a unit vector through normalization.
direction.Normalize();Step 3
Calculate the rotation vector. The rotation vector will be the cross product of our direction vector and our missile's up vector. The rotation vector will be the z-axis of the cross product.
In the diagram below the blue arrow is our direction, the red arrow is the up vector of our missile's transform, and the green arrow is our resulting z-axis component of the cross product between direction and up.
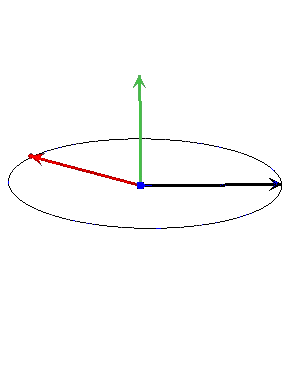
float rotateAmount=Vector3.Cross(direction,transform.up).z;Step 4
Next, we change the angularVelocity of the missile's rigidBody to control the orientation of our missile. We use an angleChangingSpeed factor to control the speed of rotation.
rb.angularVelocity = -angleChangingSpeed * rotationAmountStep 5
And finally we add velocity to our rigidBody, which controls the translation of our missile in the environment.
rb.velocity = tranform.up * movementSpeedBut wait...
We aren't done yet. In the code above we have two movement factors that need to be balanced: angleChangingSpeed and movementSpeed.
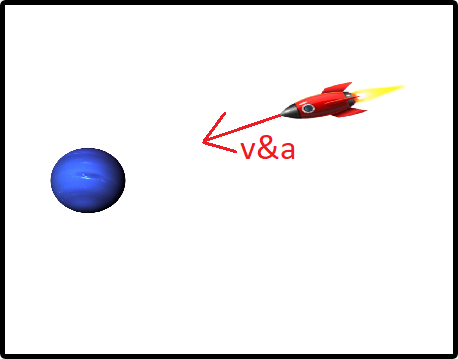
In the above Image, the missile is moving toward the target, there is no problem here.
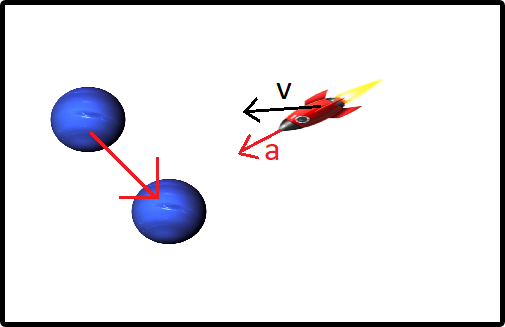
However, in this image we have one tick of the simulation and the target has moved to a new position. The missile is oriented toward the target due to angular velocity (red), but it continues to move toward the target's previous position due to its velocity (black).
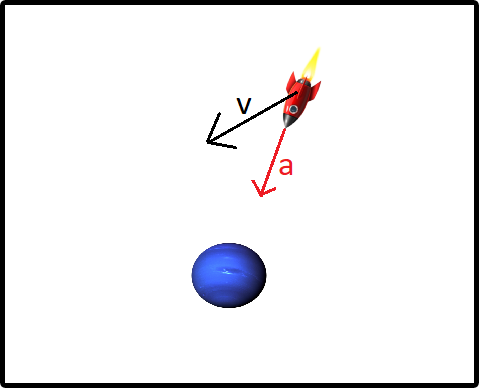
As we can see, the missile's velocity moves it behind the target (black) while the angular velocity (red) tries to pull the missile to the target.
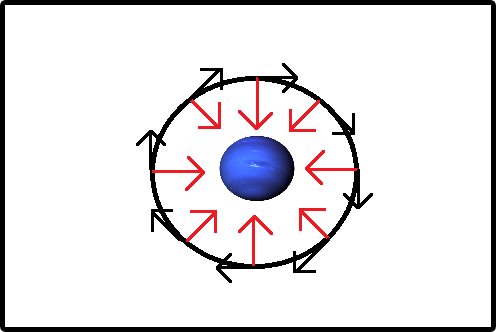
This can result in the missile falling into a stable orbit around the target and never reaching its goal. We can balance this with the angleChangingSpeed and movementSpeed parameters.
There is no particular formula to balance these parameters. The necessary parameters will depend on your gameplay and game design.
Be careful with extremes for movementSpeed, positive or negative. Too slow and your missiles won't feel like homing missiles, and too fast will lead to them being trapped in orbit.
Same with angleChangingSpeed. Too small it will be in orbit, and too high you will lose the feel of homing missiles.
I hope this article has been useful and hope to see homing missiles in your game!