
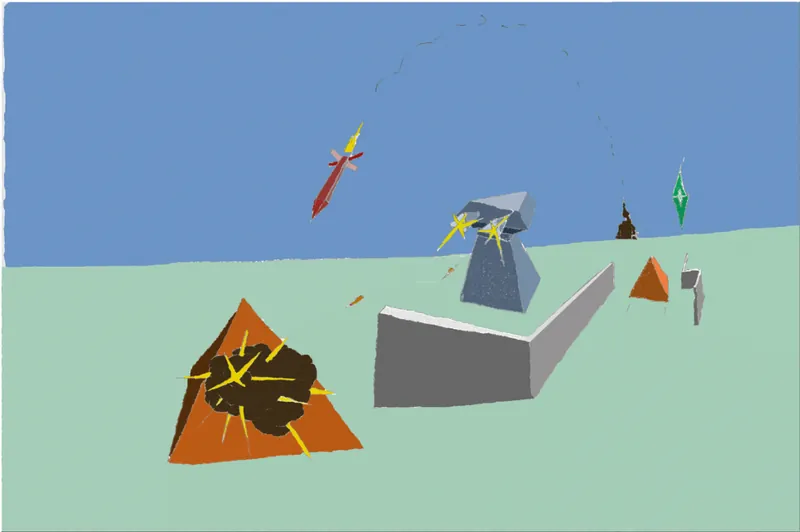
Visual Grid, Target Mesh, Keyboard and Mouse Controls.
Advertisement
Hello GameDev,
I got some essentials out of the way. I added a play field grid to the scene which has individually select-able boxes.
First things first for those who want to follow along with development with their own copies:
Grab needed files over on my previous blog
replace the script src's within the .html with
<script src='three.min.js'></script>
<script src='keyboardControls.js'></script>
<script src='mouseControls.js'></script>
<script src='generateGameContent.js'></script>
<script src='shapesTD.js'></script>
Grab the three new files:
Spoiler
var keyboardControls = keyboardControls || {};

keyboardControls.checkKeysPressed = function( keyboard ){

	// if the 'f' key is pressed, increase the size of the renderElement to the maximum size
	// allowed by the holding container.

	if( keyboard["70"] ){

		var endTime = +new Date();

		if( ( endTime - keyboard.timeStamp ) > 250 ){

			if( camera.renderSizeToggle ){
				document.body.style.margin = "8px 8px 8px 8px";
				renderer.setSize( 1024, 768 );
				camera.aspect = 1024 / 768;
				camera.updateProjectionMatrix();
				camera.renderSizeToggle = false;

				// prevent the event from firing too fast again.
				keyboard.timeStamp = endTime;


			} else {
				document.body.style.margin = "0px 0px 0px 0px";
				renderer.setSize( window.innerWidth, window.innerHeight );
				camera.aspect = window.innerWidth / window.innerHeight;
				camera.updateProjectionMatrix();
				camera.renderSizeToggle = true;

				// prevent the event from firing too fast again.
				keyboard.timeStamp = endTime;
			}
		}
	}
} Spoiler
var mouseControls = mouseControls || {};

//create objects used to raycaste with a mouse click;
mouseVector2 = new THREE.Vector2();
mouseRay = new THREE.Raycaster();

mouseControls.checkMouseDown = function( event ){

	if( camera.renderSizeToggle ){
		mouseVector2.x = ( event.clientX / ( window.innerWidth / 2 ) ) - 1;
		mouseVector2.y = - ( event.clientY / ( window.innerHeight / 2 ) ) + 1;
	} else {
		mouseVector2.x = ( event.clientX / (8+( 1024 / 2 )) ) - 1;
		mouseVector2.y = - ( event.clientY / (8+( 768 / 2 )) ) + 1;
	}

	mouseRay.setFromCamera( mouseVector2 , camera );

	var intersect = mouseRay.intersectObject( gridTargetMesh );

	// check to see if we intersected the gridTargetMesh
	if( intersect.length > 0 ){

		// reset colors of all previous cells that were selected
		for( var i=0, ii=cells.previousSelection.length; i<ii; i++ ){
			grid.geometry.colors[ cells.previousSelection[i] ].setRGB( 0.3 , 0.3 , 0.3 );
		}

      	// reset previous selection of cells.
		cells.previousSelection = [];

		// change the color of the square we've selected
		var face = intersect[ 0 ].face;
		var vectorList = cells.list[ face.index ].lineVertices;

		for( var i=0; i<vectorList.length; i++ ){
			grid.geometry.colors[ vectorList[i] ].setRGB( 0 , 0 , 1 );
			cells.previousSelection.push( vectorList[ i ] );
		}
		grid.geometry.colorsNeedUpdate = true;

	}
} Spoiler
var generateGameContent = generateGameContent || {};

generateGameContent.generateGrid = function( columns , rows ){

	/*
	*	Going to draw a basic grid of Columns * Rows.
	*
	*/

	// geometry is a blank slate object class whereby the user can add vertices and faces manually allowing a custom shape.
	var geometry = new THREE.Geometry();

	// since we want to visually display a grid for our playing field we'll use the LineBasicMaterial in combination
	// with the LineSegments Object below.

	for( var i=0, x= -( columns * 0.05 ), z= -( rows * 0.05 ) , col=0 , row=0 , ii = rows * columns; i<ii; i++ ){

		// we want the grid to be centered, so if we want 20 rows with 20 columns then the starting
		// x position will be -1 and the starting z position will be -1;

		/*
		* NOTE:
		* we're also going to use col and row to keep track of our grid construction. May seem redundent, however;
		* since we are multiplying x and z by 0.05 we will sometimes get float numbers that will screw up
		* our grid with things like 1.399999999 or 1.40000000001 if we rely on them to know when a particular
		* grid or row is finished.
		*/

		// each line segment needs to be made of a starting and ending vertice.
		// since we'll want to highlight an individual square when placing towers we'll want
		// to draw each square visible independently.

		// lines going from:

		// back to front
		geometry.vertices.push( new THREE.Vector3( x , 0 , z+0.1 ) , new THREE.Vector3( x , 0 , z ) );

		// left to right
		geometry.vertices.push( new THREE.Vector3( x , 0 , z ) , new THREE.Vector3( x+0.1 , 0 , z ) );

		x += 0.1, col++;

		if( col > columns-1 ){

			// we've drawn a complete row of half boxes, now we need to add a final line to complete the last box's edge
			// back to forward.
			geometry.vertices.push( new THREE.Vector3( x , 0 , z+0.1 ) , new THREE.Vector3( x , 0 , z ) );

			// reset x to the far left and increment z;
			z += 0.1, x = -( columns * 0.05 ), col = 0, row++;

			if( row > rows-1 ){

				x = -( columns * 0.05 );
				for( var j=0; j<columns; j++ ){

					// we've drawn all boxes except for the last row's final edges.
					geometry.vertices.push( new THREE.Vector3( x , 0 , z ) , new THREE.Vector3( x+0.1 , 0 , z ) );
					x+= 0.1;
				}
			}
		}
	}

	// we'll set the basic color of the grid to a soft gray.
	// Adding the vertex color parameter will allow us to adjust the color of each vertice manually,
	// this will come in handy later when we want to show we've selected an individual square and what not.
	var lineMaterial = new THREE.LineBasicMaterial( { vertexColors: THREE.VertexColors } );

	// add one color for each vectice in our geometry.
	for( var i=0, ii=geometry.vertices.length; i<ii; i+=2 ){
		geometry.colors[ i ] = new THREE.Color( 0.3 , 0.3 , 0.3 );
    	geometry.colors[ i + 1 ] = geometry.colors[ i ];
	}

	/* TRY RANDOM COLORS
	// random color generation for the grid
	for( var i=0, ii=geometry.vertices.length; i<ii; i+=2 ){
		geometry.colors[ i ] = new THREE.Color( Math.random(), Math.random(), Math.random() );
    	geometry.colors[ i + 1 ] = geometry.colors[ i ];
	}
	//*/

	var grid = new THREE.LineSegments( geometry , lineMaterial );

	// Alternatively, if we were to use the THREE.Line() object class lines would be drawn sequentially from vertice to vertice
	/* TRY EXAMPLE
	grid = new THREE.Line( geometry, lineMaterial );
	//*/

	// we're going to add some custom values to the grid so that later on we can retrieve them
	grid.columns = columns;
	grid.rows = rows;

	return grid;
}

generateGameContent.generateGridTargetMesh = function( grid ){

	// since we already generated the vertices for grid, we'll use that vectorr list to copy
	// vectors to our target mesh.
	var v = 0; // used as a vertices counter
	var faceOne, faceTwo;
	var vectorList = grid.geometry.vertices;

	var geometry = new THREE.Geometry();
	var basicMaterial = new THREE.MeshLambertMaterial( { color: 0x0000ff , visible: false , side: THREE.DoubleSide });
	/* VIEW MESH
	basicMaterial.visible = true;
	//*/

	for( var i=0, ii=vectorList.length; i<ii; i++ ){
		geometry.vertices.push( vectorList[i].clone() );
	}

	// now we'll create 2 faces for each square, but we'll need to know how many rows and columns there are.
	for( var i=0, ii=grid.rows, f=0/* f is used as a local face counter */; i<ii; i++ ){
		for( var j=0, jj=grid.columns; j<jj; j++ ){

			// reference the vertices index position to draw the faces.
			faceOne = new THREE.Face3( v , v+3 , v+1 );
			faceOne.index = f;

			faceTwo = new THREE.Face3( v , v+4 , v+3 );
			faceTwo.index = f;

			geometry.faces.push( faceOne , faceTwo );
			f++;
			v+=4;
		}
		v+=2;

	}

	// in order for the targeting to work later on we'll need to do the following calculations
	geometry.computeFaceNormals();
	geometry.computeBoundingSphere();

	var gridTargetMesh = new THREE.Mesh( geometry , basicMaterial );

	return gridTargetMesh;
}

generateGameContent.createCells = function( grid ){

	var cells = [];

	var vectorList = grid.geometry.vertices;
	var v = 0; // used as vertices counter;
	var c = 0; // used as cell counter;

	// we'll need to know how many rows and columns there are.

	// create first cell of first row
	cells[c] = {
		lineVertices: [ v , v+1 , v+2 , v+3 , v+4 , v+5 , v+( grid.columns*4 )+4 , v+( grid.columns*4 )+5 ],
		surroundingCells: [ 1 , grid.columns , grid.columns+1 ],
	}
	v+=4;
	c++;

	//generate first row minus first and last cell
	for( var j=1, jj=grid.columns-1; j<jj; j++ ){

		// create object for each new cell with the following:
		// - index position of vertices needed to draw line segements.
		// - index position of surrounding cells.

		cells[c] = {
			lineVertices: [ v , v+1 , v+2 , v+3 , v+4 , v+5 , v+( grid.columns*4 )+4 , v+( grid.columns*4 )+5 ],
			surroundingCells: [ c+1 , c + grid.columns + 1 , c + grid.columns , c + grid.columns - 1 , c-1 ],
		}
		v+=4;
		c++;
	}

	// create last cell of first row
	cells[c] = {
		lineVertices: [ v , v+1 , v+2 , v+3 , v+4 , v+5 , v+( grid.columns*4 )+4 , v+( grid.columns*4 )+5 ],
		surroundingCells: [ c + grid.columns , c + grid.columns-1 , c-1 ],
	}
	v+=6;
	c++;

	for( var i=1, ii=grid.rows-1; i<ii; i++ ){

		// create first cell of row
		cells[c] = {
			lineVertices: [ v , v+1 , v+2 , v+3 , v+4 , v+5 , v+( grid.columns*4 )+4 , v+( grid.columns*4 )+5 ],
			surroundingCells: [
				c + 1 ,
				c + ( grid.columns + 1 ) ,
				c + grid.columns ,
				c - grid.columns ,
				c - ( grid.columns - 1 ),
			],
		}
		v+=4;
		c++;

		for( var j=1, jj=grid.columns-1; j<jj; j++ ){

			// create object for each new cell with the following:
			// - index position of vertices needed to draw line segements.
			// - index position of surrounding cells.

			cells[c] = {
				lineVertices: [ v , v+1 , v+2 , v+3 , v+4 , v+5 , v+( grid.columns*4 )+4 , v+( grid.columns*4 )+5 ],
				surroundingCells: [
					c + 1 ,
					c + ( grid.columns + 1 ) ,
					c + grid.columns ,
					c + ( grid.columns - 1 ) ,
					c - 1 ,
					c - ( grid.columns + 1 ),
					c - grid.columns ,
					c - ( grid.columns - 1 ),
				],
			}
			v+=4;
			c++;
		}

		// create last cell of row
		cells[c] = {
			lineVertices: [ v , v+1 , v+2 , v+3 , v+4 , v+5 , v+( grid.columns*4 )+4 , v+( grid.columns*4 )+5 ],
			surroundingCells: [
				c + grid.columns ,
				c + ( grid.columns - 1 ) ,
				c - 1 ,
				c - ( grid.columns - 1 ),
				c - grid.columns ,
			],
		}
		v+=6;
		c++;
	}

	//create first cell of last row
	cells[c] = {
		lineVertices: [ v , v+1 , v+2 , v+3 , v+4 , v+5 ],
		surroundingCells: [ c+1 , c-grid.columns , c - ( grid.columns-1 ) ],
	}
	v+=4;
	c++;

	//generate first row minus first and last cell
	for( var j=1, jj=grid.columns-1; j<jj; j++ ){

		// create object for each new cell with the following:
		// - index position of vertices needed to draw line segements.
		// - index position of surrounding cells.

		cells[c] = {
			lineVertices: [ v , v+1 , v+2 , v+3 , v+4 , v+5 ],
			surroundingCells: [
				c + 1 ,
				c - 1 ,
				c - ( grid.columns + 1 ),
				c - grid.columns ,
				c - ( grid.columns - 1 ),
			],
		}
		v+=4;
		c++;
	}

	// create last cell of first row
	cells[c] = {
		lineVertices: [ v , v+1 , v+2 , v+3 , v+4 , v+5 ],
		surroundingCells: [ c -1 , c - ( grid.columns + 1 ) , c - grid.columns ],
	}

	// add remaining vertices to last row
	c -= ( grid.columns-1 )
	v =  grid.geometry.vertices.length - ( grid.columns*2 );
	for( var i=0, ii=grid.columns; i<ii; i++ ){
		cells[c].lineVertices.push( v , v+1 );
		v+=2;
		c++;
	}

	return { list: cells, previousSelection: [] };
}And then update the shapesTD.js file
var camera, scene, renderer, keyboard, lightSource;
var mouseVector2, mouseRay;
var grid, gridTargetMesh, cells;


init();
animate();

function init() {

	camera = new THREE.PerspectiveCamera( 20, 1024/768 , 0.01, 30 );
	camera.position.z = 5;
	camera.lookAt( new THREE.Vector3( 0 , 0 , 0 ) );

	//we're going to add a feature to the camera allowing us to toggle the screen size when the user presses 'f'
	camera.renderSizeToggle = false;

	// any visual content we want displayed on screen we'll add to the scene.
	scene = new THREE.Scene();

	renderer = new THREE.WebGLRenderer( { antialias: true } );
	renderer.setSize( 1024 , 768 );
	document.body.appendChild( renderer.domElement );

	lightSource = new THREE.DirectionalLight( 0xffffff, 1 );
	lightSource.position.set( 1 , 1 , 1 );
	scene.add( lightSource );

	// mouse controls
	document.addEventListener( 'mousedown' , mouseControls.checkMouseDown , false );

	// keyboard controls
	keyboard = {};
	window.onkeyup = function(e) { keyboard[e.keyCode] = false; }
	window.onkeydown = function(e) { keyboard[e.keyCode] = true; }

	// we're going to add a timestamp to the keyboard allowing us to limit how fast the keyfire method fires under
	// certain circumstances.
	keyboard.timeStamp = +new Date();

	/*
	* game content
	*
	*	first we'll add all the features for a playable game,
	* 	then we'll add an html overlay to act as our start screen.
	*/

	// PART A
	// - create visual grid
	// - create target mesh
	// - create cell array to reference between the visual grid and target mesh,
	//	 it will also act as our pathfinding array later on.


	// generate a grid and add it to the scene.
	grid = generateGameContent.generateGrid( 13 , 19 );
	scene.add( grid );

	// since the grid will act as our visual reprentation of the playing area, we'll need to know
	// which square in the grid is being selected.  For that we'll add a grid target mesh.
	gridTargetMesh = generateGameContent.generateGridTargetMesh( grid );
	scene.add( gridTargetMesh );

	// create cells to act as the go between grid and gridTargetMesh,
	// and they will also be used later on for pathfinding.
	cells = generateGameContent.createCells( grid );

}

function animate() {

	requestAnimationFrame( animate );

	keyboardControls.checkKeysPressed( keyboard );

	grid.rotation.x += 0.001;
	grid.rotation.y += 0.002;
	gridTargetMesh.rotation.x += 0.001;
	gridTargetMesh.rotation.y += 0.002;

	renderer.render( scene, camera );

}
If all goes according to plan you'll see a spinning grey grid that when you click on it will turn the selected square blue.

Advertisement
Advertisement
Advertisement
Discussion