

Making a Game with Blend4Web Part 1: The Character
Today we're going to start creating a fully-functional game app with Blend4Web.

Gameplay
Let's set up the gameplay. The player - a brave warrior - moves around a limited number of platforms. Melting hot stones keep falling on him from the sky; the stones should be avoided. Their number increases with time. Different bonuses which give various advantages appear on the location from time to time. The player's goal is to stay alive as long as possible. Later we'll add some other interesting features but for now we'll stick to these. This small game will have a third-person view. In the future, the game will support mobile devices and a score system. And now we'll create the app, load the scene and add the keyboard controls for the animated character. Let's begin!Setting up the scene
Game scenes are created in Blender and then are exported and loaded into applications. Let's use the files made by our artist which are located in the blend/ directory. The creation of these resources will be described in a separate article. Let's open the character_model.blend file and set up the character. We'll do this as follows: switch to the Blender Game mode and select the character_collider object - the character's physical object.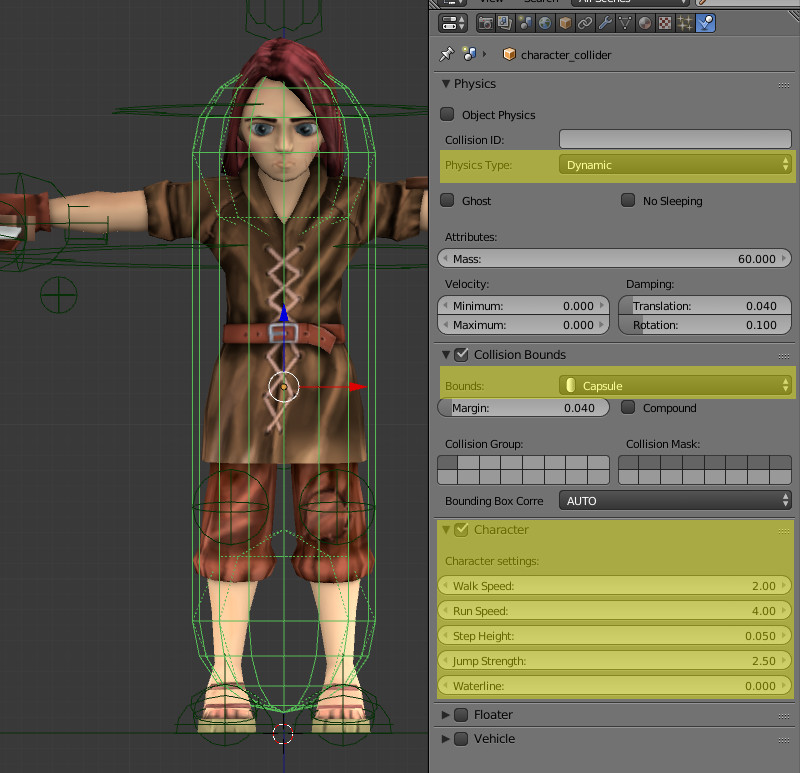
- The character group of objects (from the character_model.blend file).
- The environment group of objects (from the main_scene.blend file) - this group contains the static scene models and also their copies with the collision materials.
- The baked animations character_idle_01_B4W_BAKED and character_run_B4W_BAKED (from the character_animation.blend file).
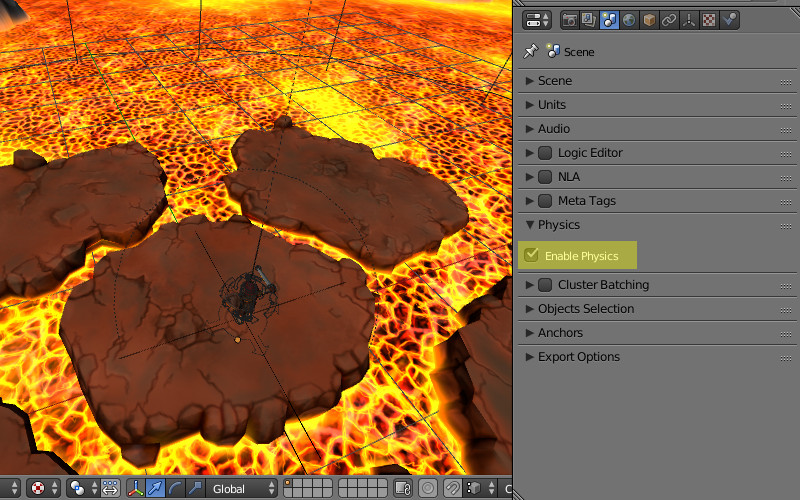
NOTE: To link components from another file go to File -> Link and select the file. Then go to the corresponding datablock and select the components you wish. You can link anything you want - from a single animation to a whole scene.Make sure that the Enable physics checkbox is turned on in the scene settings. The scene is ready, lets move on to programming.
Preparing the necessary files
Let's place the following files into the project's root:- The engine b4w.min.js
- The addon for the engine app.js
- The physics engine uranium.js
<!DOCTYPE html> <html> <head> <meta charset="UTF-8"> <meta name="viewport" content="width=device-width, initial-scale=1, maximum-scale=1"> <script type="text/javascript" src="b4w.min.js"></script> <script type="text/javascript" src="app.js"></script> <script type="text/javascript" src="game_example.js"></script> <style> body { margin: 0; padding: 0; } </style> </head> <body> <body> </html> Next we'll open the game_example.js script and add the following code: "use strict" if (b4w.module_check("game_example_main")) throw "Failed to register module: game_example_main"; b4w.register("game_example_main", function(exports, require) { var m_anim = require("animation"); var m_app = require("app"); var m_main = require("main"); var m_data = require("data"); var m_ctl = require("controls"); var m_phy = require("physics"); var m_cons = require("constraints"); var m_scs = require("scenes"); var m_trans = require("transform"); var m_cfg = require("config"); var _character; var _character_body; var ROT_SPEED = 1.5; var CAMERA_OFFSET = new Float32Array([0, 1.5, -4]); exports.init = function() { m_app.init({ canvas_container_id: "canvas3d", callback: init_cb, physics_enabled: true, alpha: false, physics_uranium_path: "uranium.js" }); } function init_cb(canvas_elem, success) { if (!success) { console.log("b4w init failure"); return; } m_app.enable_controls(canvas_elem); window.onresize = on_resize; on_resize(); load(); } function on_resize() { var w = window.innerWidth; var h = window.innerHeight; m_main.resize(w, h); }; function load() { m_data.load("game_example.json", load_cb); } function load_cb(root) { } }); b4w.require("game_example_main").init(); If you have read Creating an Interactive Web Application tutorial there won't be much new stuff for you here. At this stage all the necessary modules are linked, the init functions and two callbacks are defined. Also there is a possibility to resize the app window using the on_resize function. Pay attention to the additional physics_uranium_path initialization parameter which specifies the path to the physics engine file. The global variable _character is declared for the physics object while _character_body is defined for the animated model. Also the two constants ROT_SPEED and CAMERA_OFFSET are declared, which we'll use later. At this stage we can run the app and look at the static scene with the character motionless. Moving the character
Let's add the following code into the loading callback: function load_cb(root) { _character = m_scs.get_first_character(); _character_body = m_scs.get_object_by_empty_name("character", "character_body"); setup_movement(); setup_rotation(); setup_jumping(); m_anim.apply(_character_body, "character_idle_01"); m_anim.play(_character_body); m_anim.set_behavior(_character_body, m_anim.AB_CYCLIC); } First we save the physical character model to the _character variable. The animated model is saved as _character_body. The last three lines are responsible for setting up the character's starting animation. - animation.apply() - sets up animation by corresponding name,
- animation.play() - plays it back,
- animation.set_behaviour() - change animation behavior, in our case makes it cyclic.
NOTE: Please note that skeletal animation should be applied to the character object which has an Armature modifier set up in Blender for it.Before defining the setup_movement(), setup_rotation() and setup_jumping() functions its important to understand how the Blend4Web's event-driven model works. We recommend reading the corresponding section of the user manual. Here we will only take a glimpse of it. In order to generate an event when certain conditions are met, a sensor manifold should be created.
NOTE: You can check out all the possible sensors in the corresponding section of the API documentation.Next we have to define the logic function, describing in what state (true or false) the certain sensors of the manifold should be in, in order for the sensor callback to receive a positive result. Then we should create a callback, in which the performed actions will be present. And finally the controls.create_sensor_manifold() function should be called for the sensor manifold, which is responsible for processing the sensors' values. Let's see how this will work in our case. Define the setup_movement() function:
function setup_movement() { var key_w = m_ctl.create_keyboard_sensor(m_ctl.KEY_W); var key_s = m_ctl.create_keyboard_sensor(m_ctl.KEY_S); var key_up = m_ctl.create_keyboard_sensor(m_ctl.KEY_UP); var key_down = m_ctl.create_keyboard_sensor(m_ctl.KEY_DOWN); var move_array = [ key_w, key_up, key_s, key_down ]; var forward_logic = function(s){return (s[0] || s[1])}; var backward_logic = function(s){return (s[2] || s[3])}; function move_cb(obj, id, pulse) { if (pulse == 1) { switch(id) { case "FORWARD": var move_dir = 1; m_anim.apply(_character_body, "character_run"); break; case "BACKWARD": var move_dir = -1; m_anim.apply(_character_body, "character_run"); break; } } else { var move_dir = 0; m_anim.apply(_character_body, "character_idle_01"); } m_phy.set_character_move_dir(obj, move_dir, 0); m_anim.play(_character_body); m_anim.set_behavior(_character_body, m_anim.AB_CYCLIC); }; m_ctl.create_sensor_manifold(_character, "FORWARD", m_ctl.CT_TRIGGER, move_array, forward_logic, move_cb); m_ctl.create_sensor_manifold(_character, "BACKWARD", m_ctl.CT_TRIGGER, move_array, backward_logic, move_cb); } Let's create 4 keyboard sensors - for arrow forward, arrow backward, S and W keys. We could have done with two but we want to mirror the controls on the symbol keys as well as on arrow keys. We'll append them to the move_array. Now to define the logic functions. We want the movement to occur upon pressing one of two keys in move_array. This behavior is implemented through the following logic function: function(s) { return (s[0] || s[1]) } The most important things happen in the move_cb() function. Here obj is our character. The pulse argument becomes 1 when any of the defined keys is pressed. We decide if the character is moved forward (move_dir = 1) or backward (move_dir = -1) based on id, which corresponds to one of the sensor manifolds defined below. Also the run and idle animations are switched inside the same blocks. Moving the character is done through the following call: m_phy.set_character_move_dir(obj, move_dir, 0); Two sensor manifolds for moving forward and backward are created in the end of the setup_movement() function. They have the CT_TRIGGER type i.e. they snap into action every time the sensor values change. At this stage the character is already able to run forward and backward. Now let's add the ability to turn. Turning the character
Here is the definition for the setup_rotation() function: function setup_rotation() { var key_a = m_ctl.create_keyboard_sensor(m_ctl.KEY_A); var key_d = m_ctl.create_keyboard_sensor(m_ctl.KEY_D); var key_left = m_ctl.create_keyboard_sensor(m_ctl.KEY_LEFT); var key_right = m_ctl.create_keyboard_sensor(m_ctl.KEY_RIGHT); var elapsed_sensor = m_ctl.create_elapsed_sensor(); var rotate_array = [ key_a, key_left, key_d, key_right, elapsed_sensor ]; var left_logic = function(s){return (s[0] || s[1])}; var right_logic = function(s){return (s[2] || s[3])}; function rotate_cb(obj, id, pulse) { var elapsed = m_ctl.get_sensor_value(obj, "LEFT", 4); if (pulse == 1) { switch(id) { case "LEFT": m_phy.character_rotation_inc(obj, elapsed * ROT_SPEED, 0); break; case "RIGHT": m_phy.character_rotation_inc(obj, -elapsed * ROT_SPEED, 0); break; } } } m_ctl.create_sensor_manifold(_character, "LEFT", m_ctl.CT_CONTINUOUS, rotate_array, left_logic, rotate_cb); m_ctl.create_sensor_manifold(_character, "RIGHT", m_ctl.CT_CONTINUOUS, rotate_array, right_logic, rotate_cb); } As we can see it is very similar to setup_movement(). The elapsed sensor was added which constantly generates a positive pulse. This allows us to get the time, elapsed from the previous rendering frame, inside the callback using the controls.get_sensor_value() function. We need it to correctly calculate the turning speed. The type of sensor manifolds has changed to CT_CONTINUOUS, i.e. the callback is executed in every frame, not only when the sensor values change. The following method turns the character around the vertical axis: m_phy.character_rotation_inc(obj, elapsed * ROT_SPEED, 0) The ROT_SPEED constant is defined to tweak the turning speed. Character jumping
The last control setup function is setup_jumping(): function setup_jumping() { var key_space = m_ctl.create_keyboard_sensor(m_ctl.KEY_SPACE); var jump_cb = function(obj, id, pulse) { if (pulse == 1) { m_phy.character_jump(obj); } } m_ctl.create_sensor_manifold(_character, "JUMP", m_ctl.CT_TRIGGER, [key_space], function(s){return s[0]}, jump_cb); } The space key is used for jumping. When it is pressed the following method is called: m_phy.character_jump(obj) Now we can control our character! Moving the camera
The last thing we cover here is attaching the camera to the character. Let's add yet another function call - setup_camera() - into the load_cb() callback. This function looks as follows: function setup_camera() { var camera = m_scs.get_active_camera(); m_cons.append_semi_soft_cam(camera, _character, CAMERA_OFFSET); } The CAMERA_OFFSET constant defines the camera position relative to the character: 1.5 meters above (Y axis in WebGL) and 4 meters behind (Z axis in WebGL). This function finds the scene's active camera and creates a constraint for it to follow the character smoothly. That's enough for now. Lets run the app and enjoy the result! 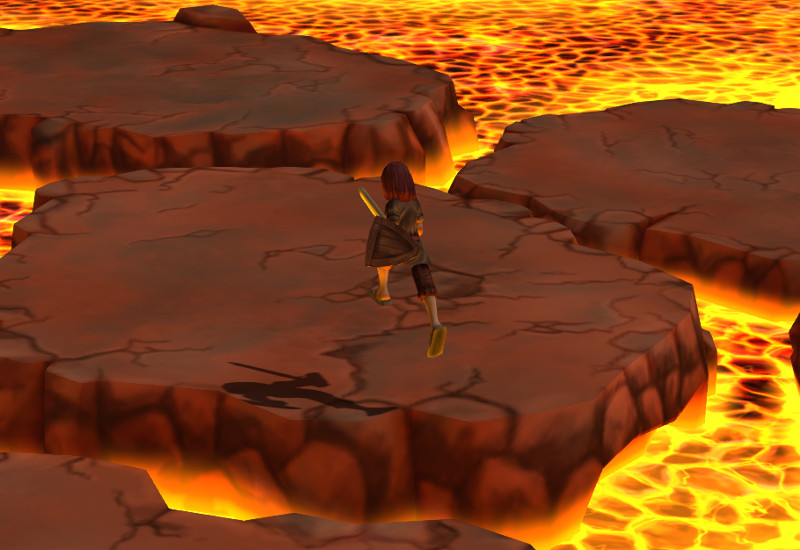 Link to the standalone application The source files of the application and the scene are part of the free Blend4Web SDK distribution.
Related Tutorials
Ai image to 3D Game ready model and animation in 3 minutes
No 3D modeling or animation skills? No problem! In this video, a professional 3D artist, demonstrates how to create a f…
 alex_cgw

Unreal Engine: Creation of Parallax Occlusion Mapping (POM) in details
Parallax Occlusion Mapping (POM) is a complex texture-based approach to add more details for meshes. With POM we get mo…

Generating a SoulerCoaster in Unity
Learn to create a basic SoulerCoaster effect in Unity.
Creating Promo Art: The Process | Hyperclass Ark
Our artist, Philip Bell, discussed the stages involved in creating promotional artwork for the project.
 hyperclassark
Lessons, Stages of drawing Digital illustration "Fairytale house in the forest"
At the beginning of this illustration, I did the rough sketch, then drawing the outline, then painting in color, applyi…
 Nadia_Meldova
Lessons, Stages of drawing "Magic book"
At the beginning of this illustration, I did the rough sketch, then drawing the outline, then painting in color, applyi…
Nadia_Meldova
Discussion
More from Evgeny Rodygin
Making a Game with Blend4Web Part 2: Models for the Location
We continue working on a simple game. This time we'll discuss modeling and texturing models for the location. All is do…
Mikhail Luzyanin

Making a Game with Blend4Web Part 6: Animation and FX
This article is about character modeling and animation, and also about creating the effect of the deadly falling rocks.
Mikhail Luzyanin
Making a Game with Blend4Web Part 7: Enriching the Game World
In this article, we'll explain how to create environment FX and other details which make the game world more diverse an…
Mikhail Luzyanin
Discussion