
Cellular Textures, the light speed approach
Procedural texture generation is a very flexible and powerful technique, and the results are awesome looking textures that only require a few hundred bytes. Cellular textures is one such method. This article will describe how they are generated starting with a simple but slow algorithm. Then it will look over an advanced algorithm that takes linear time and provides some nice extra features

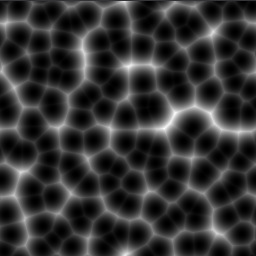
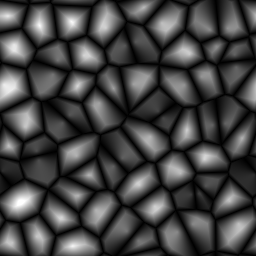 They are very versatile, you might use them to create spider webs or cracked dirt textures. If you search the internet you will find some great tutorials (see link section). They mostly involve an easy but slow approach. I will explain this basic approach too, and improve it step by step. In the end we will have an algorithm that is much faster and has some nice extra features. The basic approach (turtle speed) Well, the basic idea is easy. Let's assume you want to create a texture that is 256 x 256 pixels large. The first step of the algorithm is to generate a set of random points let's call this [sup]P[/sup]. As you can see, the x and y coordinates must lie between 0 and texture size - 1. So, for each point [sup]q[/sup] of the texture you have to find the point p?[sup]P[/sup] that has the smallest distance to [sup]q[/sup], and store it into an array. In the case of q?[sup]P[/sup] the distance is set to zero. The distance we just found will determine the color of the pixel in our texture. Usually, the distance is calculated by using the Euclidean formula. For our example it would look like this:
  There are some more possibilities, but let's skip these for now. Once you have calculated all distances, you have to normalise the values in the array to the range of 0 to 255. These values can be easily transformed into a grey scale value by setting red green and blue to the value of the normalized array. That's pretty simple, right? Just calculate the distances and use them to colourize your texture. As far as I know this is the most common way to create the nice-looking cellular textures. Well, the main part of our algorithm is to find the closest point of our random set. If we want to speed up the algorithm we need to speed up that part. But first, it's time to have a look at the algorithm's running time. Let [sup]m[/sup] be the cardinality of [sup]P[/sup], our random point set, and let be [sup]n[/sup] the count of points in our texture. It is clear that the common algorithm needs to calculate distances for each of our points. This leads to a running time of, O(n * m) This means, if you want your texture to look finer and you use more random points, the time it takes to calculate rises drastically. The BSP approach (cheetah speed) The first optimization that came into my mind was to use a binary space tree, to store the random points. Once we've created our tree we can use it to speed up "the quest for the closest point" In a BSP, each inner node holds two points and each leave one. In addition, each inner node has two branches, so we need at least two points to build a tree. The left branch of an inner node holds points that are closer to the first Node. The right branch works the other way around. So, if you search the closest point of our random set, you start at the root, calculate which point is closer and follow the corresponding branch. Ok, lots of information here, let's take an example:
 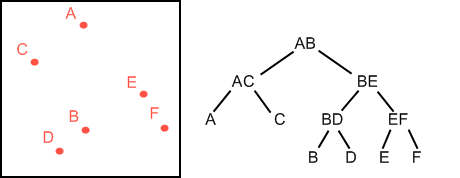 The red points are our random points. The first point added is A then B , C and so on. If we add the points in another order the tree will look different. You need to check if the tree is balanced, in the worst case you will deal with a regular list, which won't be faster. This approach increases the speed but needs some preprocessing like rebalancing and so on. For me this is no option because it needs too much extra code. Nevertheless, the running time of this approach decreases to something like O(n * log(m)) (average case). The grid approach (light speed) OK, fasten your seatbelts - we are reaching light speed now! First of all remember that the color of a texture point flows from the distance to the closest point of our random set [sup]P[/sup]. So, that's our main task. If we want to speed up our algorithm, optimizing this task is a good start. We can archive this using a grid. We put the grid over our texture. Let's start with a 8 x 8 grid:
 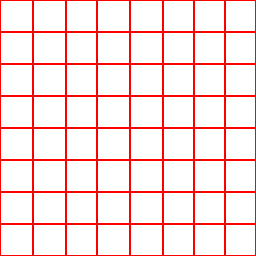 As you can see our 8x8 grid has 64 cells. Actually the grid is just a virtual construct to relax the problem. The main trick now is to pick a random point for each cell. So in our case we need 64 random points. The x and y values of our points must lie in the range of the corresponding cell boundaries, like this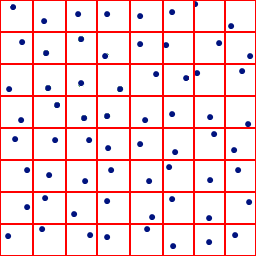
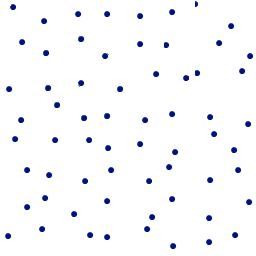 The blue points represent our random set [sup]P[/sup]. Okay now look at this:
 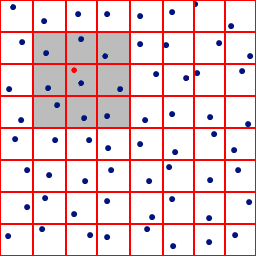 Let the red point be an arbitrary point q, and we want to know the closest point p?[sup]P[/sup]. All we need to do is calculate the distances to the point that shares the same cell as q, and the eight surrounding ones. In the image the corresponding cells are grey. That's it ! One of these eight points must be the closest. Any other point must have a greater distance. After only nine distance calculations, we got our closest point p?[sup]P[/sup]! Now that the cardinality of [sup]P[/sup] doesn't matter any more, the running time of this approach is, O(n * 9) no matter whether you take 16 or 1024 random points! Extra features Making it tillable Often you want your textures to be tillable. To achieve this you need to consider the "wrapped" points too. Let's call the cell that contains our arbitrary point [sup]q[/sup] Q-Cell. And now let's assume Q-Cell is the upper left cell. The Q-Cell has no left neighbor, so we need to wrap, and take the upper right Cell as the Q-Cell's left neighbor. Look at the following image, it should make things clear:
 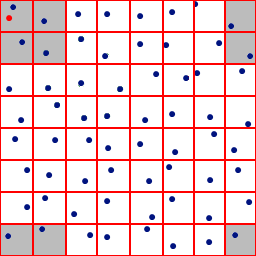 In my code I do something like this to perform the wrap (Pseudo code): LeftNeighborIndex = (QCell.X+NumOfCellsPerRow-1) mod NumOfCellsPerRow I perform a kind of "shift" here, and the -1 should "give" me the left-hand neighbor. In our case the Q-Cell has the (horizontal) index 0 and its right-hand neighbor (far-right) the index 7. If we put this information into our formula the result is (0+8-1) mod 8 = 7 ? correct! And as another example we assume our Q-Cell is the upper right-hand, and we want to know what its right-hand neighbor is (add 1) our calculation looks like this (7+8+1) mod 8 = 16 mo 8 = 0 ? correct! Create different shapes If you look at the three images in the introduction, you will notice that the left-hand one looks different. I used another distance function here, namely the distance of the two closest points. As I mentioned before, you can use several distance functions. Play around with it, invert it, square it, multiply the two closest, there are no limits! The following two images are created with Manhattan-noise. It is realized by taking the two closest points and subtract their x and y values
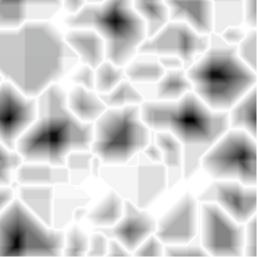
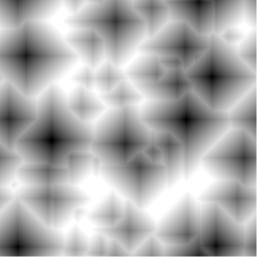 Flaws Well like all good things, this approach has some flaws. There are some extremly rare cases when this algorithm produces not the same results as the naive one. Take a look at this picture:
  The green line indicates the smallest distance. As you can see the grid algorithm will select another point. This can be fixed by widen the grid and check 5x5 instead of 3x3. I can tell you that I did a lot of tests with 3x3 grid and the results were equal, but I still want to point that weakness out. Closing Words So, this is the end my friend. I hope you had fun reading this article, because it was a lot of fun writing it. Go to my blog to find out more about my work and my procedural content editor (see link section). If you have any questions feel free to write an email to [email="jazzoid@gmx.de"]jazzoid@gmx.de[/email]. Cheers, Carsten Links http://kastor.wordpress.com/ http://graphicdesignertoolbox.com/screenshots (look at worley noise) http://www.blackpawn.com/texts/cellular/default.html http://petewarden.com/notes/archives/2005/05/testing.html http://www.worley.com/
Related Tutorials

Procedural Generation of 2D Tile Maps in Games
The article explains how to build a procedural 2D cave map generator using cellular automata. It covers map representat…

Localizing A Game Into French — Which Variant Should You Choose?
So, you’re making an awesome indie game, and now you’re thinking about localizing it into French? Great idea! There ar…
 Level Up Translation

How Long Does It Take To Localize An Indie Game?
So you’re planning on localizing your indie game, but you’re not sure how much time to schedule in. While the timing o…
Level Up Translation

Creating game videos: best practices and pitfalls to avoid
Game video production: practical tips on how to create a game trailer or teaser that you can be proud of. Give your aud…
 Alconost

Adopting CI/CD: How Midwinter Entertainment iterates at speed with the help of IMS
Game development was once like one long sprint: a huge effort until you reached the finish line — at which point you co…
 GameDev.net

5 Things to Consider When Making a Video to Promote Your App or Game
How can you show an app or game in your video in a way that attracts new users? Let’s take a look at what to go by when…
Alconost
Discussion