When we started our game, we already knew it was going to be really abstract.
Therefore, we also knew that, in term of shaders, it would be a real challenge.
However, because we use jMonkey Engine (which is a shader oriented engine), we also knew that doing a custom shader with it was going to be a piece of cake.
The Idea
I used to be an avid TF2 player some time ago and I also started watching YouTubers TF2 just for fun.
But the fact is that, surprisingly, some of these creators were trying to diversify their channel.
Enter FUNKe, one of my favorite TF2 YouTubers.
You see, he started as a normal TF2 content creator but later tried to diversify the topics of his videos. One of these videos was on the anime of Jojo's Bizarre Adventure. (I'm not a fan of anime but if I had to watch one, it will probably be that one)
He said that the anime has a really abstract idea of color palettes: in some scenes, one character could be colored green while in the next, it is colored purple. That gave me an idea ...
A Color Palette That Can Change
The idea is to use a default color palette for each model and then, with a globally defined setting, dynamically change the specific palette used. In this way, we can change our palette according to the current level or even when events occurs in game.
For example, this means that a sword can actively change its colors each time the player changes level.
This can be really flexible. With some cleverness, we can make a truly abstract and unique game.
In Practice
All color palettes are stored on a single 512x512 texture where each pixel is a color.
The coordinates are chosen according to whether the mesh is static or generated.
Here's an example of a single palette:
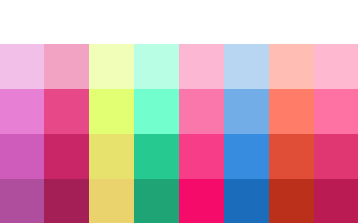
Keep in mind that it's zoomed in: each and every of these squares is supposed to be a single pixel.
In our code, we load the material of the palette only once and apply it to almost all our meshes:
paletteMaterial = assetManager.loadMaterial("path/to/palette/material/definition.j3md"); // The Palette material

TextureKey atlasTextureKey = new TextureKey("path/to/palette/texture.png", false);
m_atlasPalette = assetManager.loadTexture(atlasTextureKey); // The texture material
For Static Meshes
When we model our static meshes, we make sure that their UV mapping is properly aligned in the palette's texture in the appropriate pixel.
Here is a simple sword model in blender.
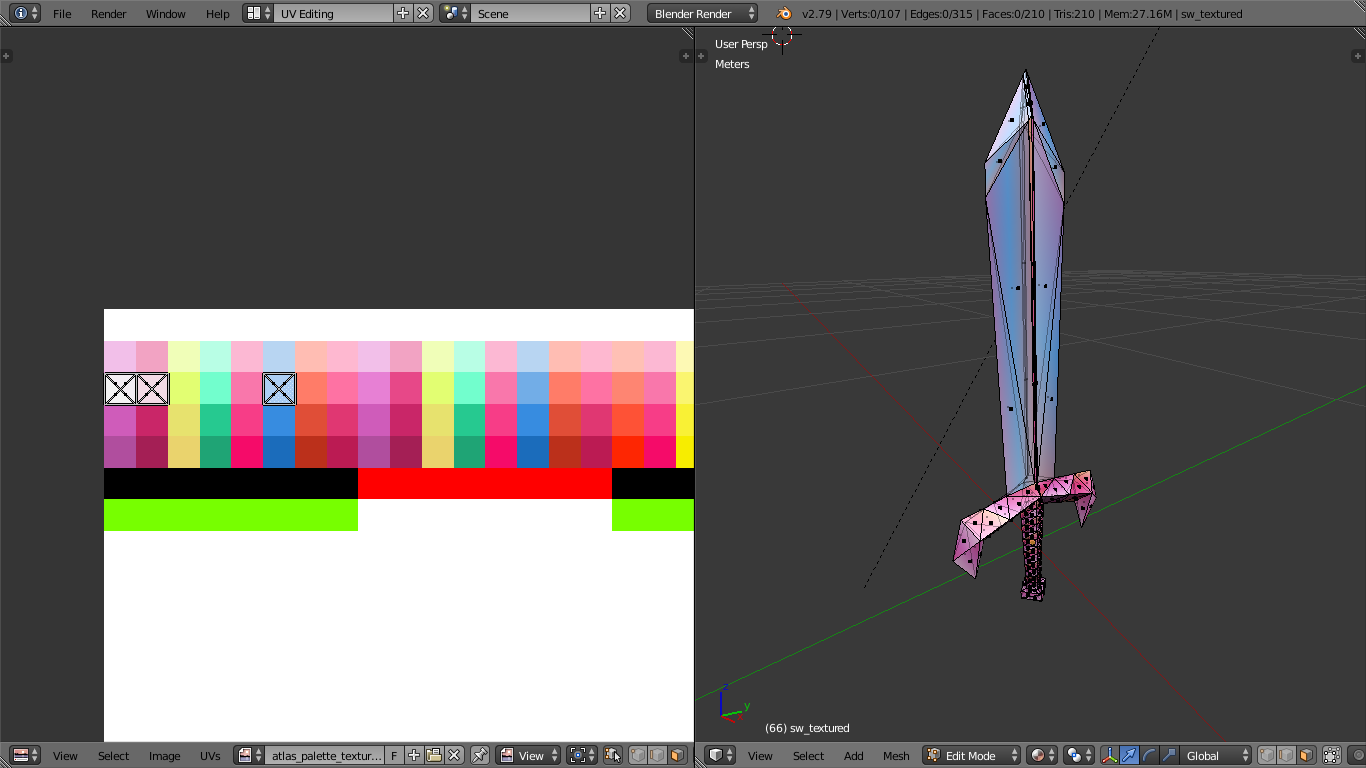
We can see that even though the UV map is really distorted, it fits well and is well aligned in the texture. Because our game is low poly and doesn't use detailed textures, there is no reason to ease these UV maps.
In blender, there is a filter that changes the way our texture is displayed. Because we're going to change that in our code it doesn't really matter.
We can actually fix that in our code, and it's very easy:
// The Palette texture is loaded manually to overrite JMonkey's default filters
paletteTexture.setMinFilter(Texture.MinFilter.NearestNoMipMaps);
paletteTexture.setMagFilter(Texture.MagFilter.Nearest);
We do that kind of UV mapping for (almost) all of our static meshes.
For Generated Meshes
Our game generates meshes that are used in our organic dungeon, but the UV mapping is quite basic...
To make them compatible with our shader, we must explicitly modify the UV mapping of these meshes.
Because our texture is actually an amalgam of all palettes, we have to take the first palette (which is our default palette) and use its UV coordinates to UV map our generated mesh.
To help us with that, we made some enums that stores the UV coordinates of these colors.
Technically speaking, in this case we use the middle of each pixel as UV coordinates.
After having generated our mesh, we use a float buffer to store the UV coordinates of each of the mesh's triangles. That's why we need those enums.
Here's the code we use to find out those UVs:
public static FloatBuffer createDungeonTextureBuffer(FloatBuffer normalBuffer) {
  FloatBuffer textureBuffer = (FloatBuffer) VertexBuffer.createBuffer(VertexBuffer.Format.Float,
                                                                      TEXTURE_BUFFER_COMPONENT_COUNT,
                                                                      normalBuffer.capacity() / NORMAL_BUFFER_COMPONENT_COUNT);

  float skyUCoordinate = AtlasPaletteColor.SKY.getBaseTint().getUCoordinate();
  float skyVCoordinate = AtlasPaletteColor.SKY.getBaseTint().getVCoordinate();

  float soilUCoordinate = AtlasPaletteColor.SOIL.getBaseTint().getUCoordinate();
  float soilVCoordinate = AtlasPaletteColor.SOIL.getBaseTint().getVCoordinate();

  float wallUCoordinate = AtlasPaletteColor.WET_DETAIL.getBaseTint().getUCoordinate();
  float wallVCoordinate = AtlasPaletteColor.WET_DETAIL.getBaseTint().getVCoordinate();

  Vector3f normal = new Vector3f();
  while (textureBuffer.position() < textureBuffer.capacity()) {
    normal.set(normalBuffer.get(), normalBuffer.get(), normalBuffer.get());
    // Ground
    if (Direction3D.TOP.getDirection().equals(normal)) {
      textureBuffer.put(soilUCoordinate);
      textureBuffer.put(soilVCoordinate);
    }
    // Ceiling
    else if (Direction3D.BOTTOM.getDirection().equals(normal)) {
      textureBuffer.put(skyUCoordinate);
      textureBuffer.put(skyVCoordinate);
    }
    // Walls
    else {
      textureBuffer.put(wallUCoordinate);
      textureBuffer.put(wallVCoordinate);
    }
  }

  return textureBuffer;
}
With this, we can chose the UV based on the triangle's normal.
The Shader
The shader itself is quite simple. We took the generic shader provided with jMonkey Engine and added some uniforms and constants here and there.
We take the dimensions of a palette (which is 8 x 5) and change the texture with this piece of code in our fragment shader:
/* IN OUR FRAGMENT SHADER */

const int m_PaletteWorldWidth = 8;
const int m_PaletteWorldHeight = 5;
uniform int m_PaletteWorldIndex;

// Later in the shader...

ivec2 textureDimensions = textureSize(m_DiffuseMap, 0);
newTexCoord.x += float(m_PaletteWorldWidth) * float(m_PaletteWorldIndex) / float(textureDimensions.x);
We can then change the used palette by changing the PaletteWordIndex uniform in the code by doing this:
// Palette Material is loaded manually to be able to change its PaletteWorldIndex value
paletteMaterial.setInt("PaletteWorldIndex", paletteIndexUsed);  // paletteIndexUsed is usually an Enum value
Changing the palletIndexUsed value to a different one does that:
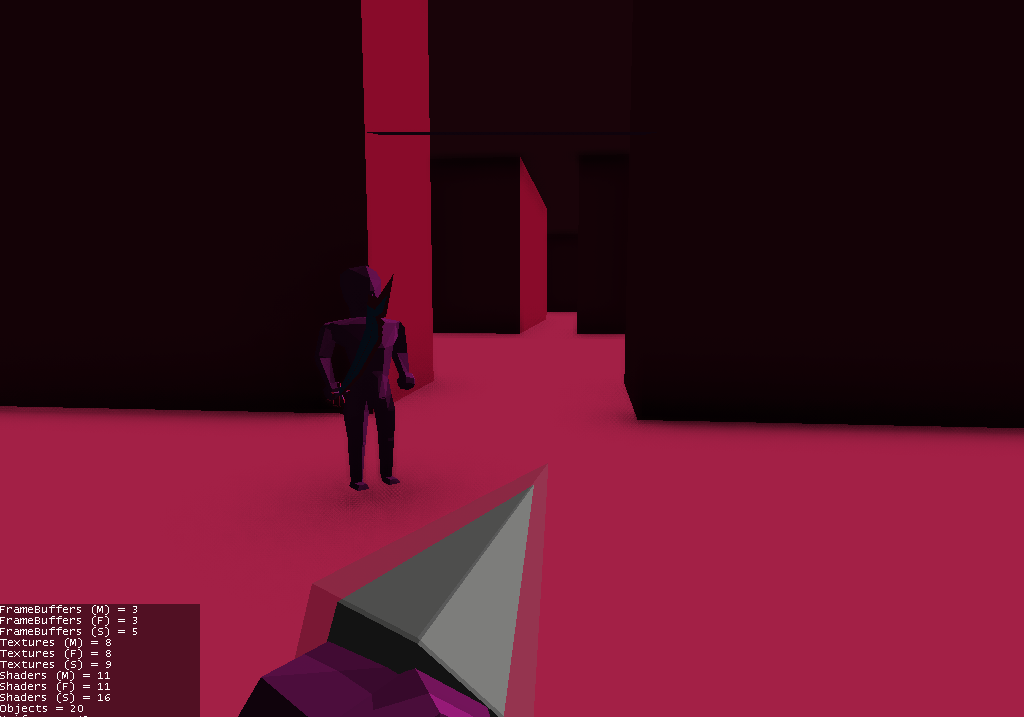
And then we change the value of PaletteWorldIndex to 2:
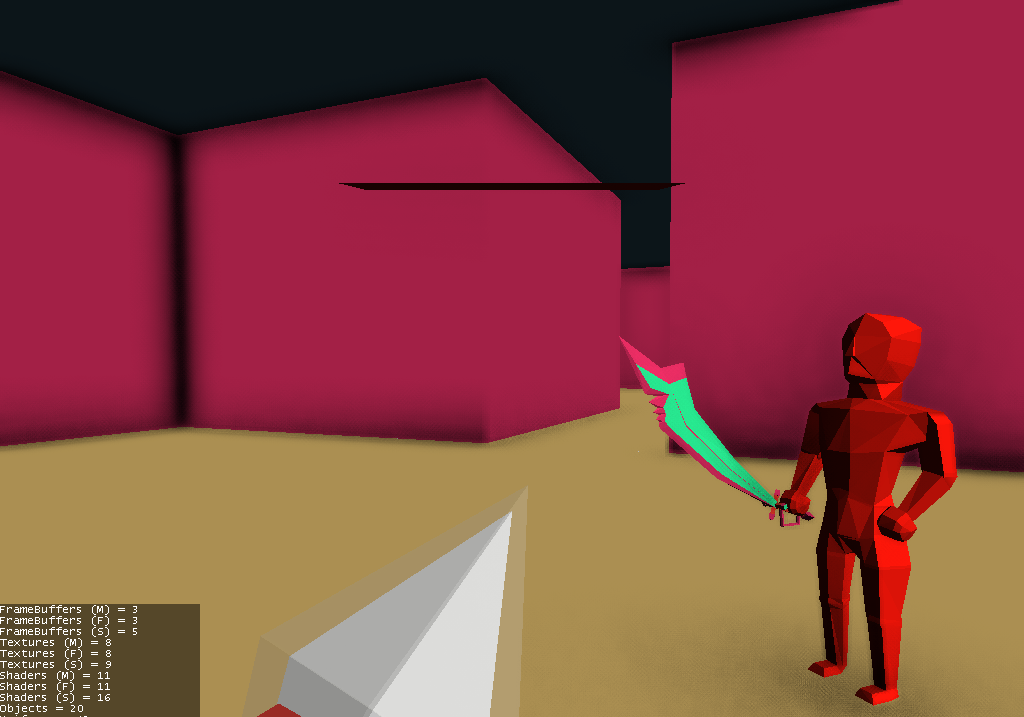
Although the colors are similar, they are also technically different. This can give us a lot of flexibility, but we still have to be careful: we still need to evoke the right emotions by using the right color at the right place at the right time. Otherwise, it can be harmful to our artistic style.
We also need to maintain some visual consistency with the most crucial meshes. For example, our white crystal there could possibly be colored, and this color could be very important for the gameplay.