
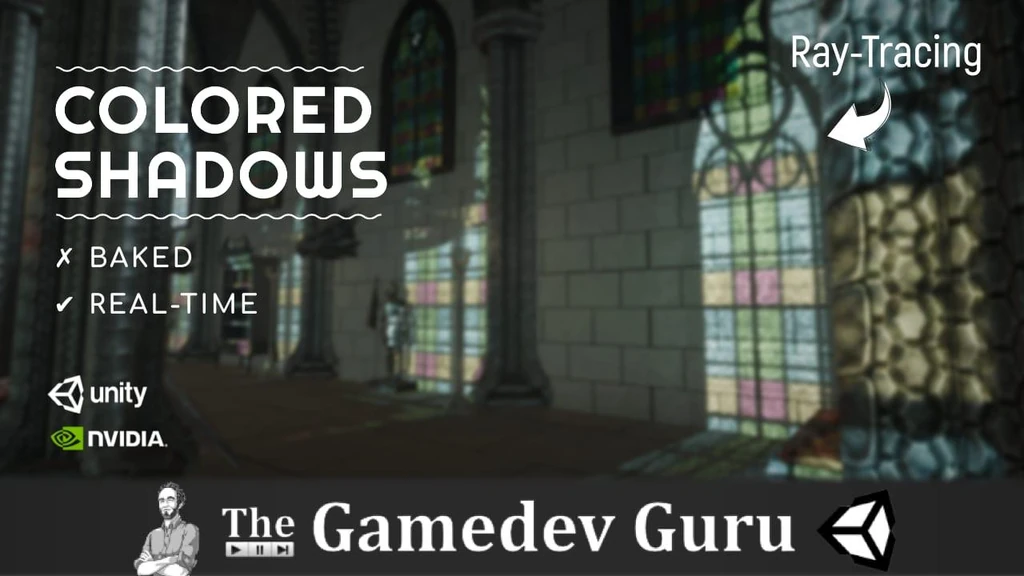
Forget Monochrome Shadows → Go Colored Instead
Learn how to render ray-traced colored shadows in Unity to give a unique tint to the style of your game. Real-time ray-tracing will do this for you.

Learn how to render ray-traced colored shadows in Unity to give a unique tint to the style of your game. Real-time ray-tracing will do this for you.
[For better formating, read the original blog post here]

TABLE OF CONTENTS
The Goal: Level Up Your Visuals
Attempt #1: Semi-Transparent Colored Material
Why Wouldn't That Work? — Realigning Expectations
Attempt #2: Unity Ray-Traced Colored Shadows
1. Enable HDRP and Ray-Tracing
2. Enable Colored Shadows in Your Directional Light
3. Set Up Transparency and Refraction in Your Material
The Ultimate Result: Ray-Traced Colored Shadows in Unity
The Performance Cost of Ray-Traced Colored Shadows in Unity
The Goal: Level Up Your Visuals
Black, hard-shaped shadows are boring. No secret here.
That's why over time we upgraded from rendering hard shadows to the better looking soft shadows. A well-needed realism upgrade.
But in the game dev scene, we were still missing the next big step: to upgrade from monochrome shadows to colored shadows.
How is that, you might ask?
Go to your local church and see the nice colored shadows that the stained glasses project (if the church is not on a tight budget, that is). They look impressive.
Or just any fancy building in general, like this one.

How do you like them?
Imagine the unique scenery you could build for your game with well-polished, real-time colored shadows.
Ok, stop imagining. Because now you can in Unity.
So let's get to draw colored shadows.
What could be our first approach?
A semi-transparent colored material, of course.
Attempt #1: Semi-Transparent Colored Material
A stained glass is all we need, right?
Setup With HDRP/Lit Shader
That means:
- A thin box-like mesh
- With a lit / standard shader
- Set to transparent rendering mode
- With the color/texture and alpha you want
In other words, this:

Unity Lit: Semi-Transparent Material
Now we just need a directional light, enable shadow casting and play with the opacity aaaand...
Ooops... what happened there?
A grey shadow still?
That's not what we want.
But why did this happen?
Why Wouldn't That Work? — Realigning Expectations
In traditional rasterisation graphics, we use a technique called shadow mapping (any of its variants).
In short, we treat a light as if it was a camera. Then, we check what surfaces that "camera" can see... and which surfaces it can't see.
It is the later ones that are so important for rendering shadows.
Here's the simplified idea: if a surface can't be seen from that light, we say it is occluded and "paint" a shadow on that surface.
It's kind of a binary decision. That point on the surface is either on the shade or not.
(really simplified explanation)
So if you wanted to color your shadows, then you would need to know the (many) surfaces your light "rays" go through. And their properties and bla bla.
In other words, we would need to trace rays.
And that brings us to ray tracing. Our second attempt.
Surprised?
Attempt #2: Unity Ray-Traced Colored Shadows
So this is the plan:
- We are going to "shoot" rays
- that go through surfaces
- while we accumulate information about surfaces we go through (e.g. the color of our stained windows)
- so that when our light rays hit a surface that we need to shade
- we know the kind of shadow to render on that surface
It sounds complex.
But it isn't, because Unity takes well care of us.
This is what you need to do:
- Enable HDRP and ray-tracing
- Enable colored shadows in our directional light
- Make our material transparent
- Give our material a refraction mode and a refraction texture/color
Let me explain
1. Enable HDRP and Ray-Tracing
I won't go in detail on this one. It's already covered in other tutorials.
Note: there are GPU requirements for ray-tracing to work. Citing Unity documentation:
Full ray tracing hardware acceleration is available on following GPUs:
- NVIDIA GeForce RTX 2060, RTX 2060 Super, RTX 2070, RTX 2070 Super, RTX 2080, RTX 2080 Super, RTX 2080 Ti, and NVIDIA TITAN RTX
- NVIDIA Quadro RTX 3000 (laptop only), RTX 4000, RTX 5000, RTX 6000, RTX 8000
NVIDIA also provides a ray tracing fallback for some previous generation graphics cards:
- NVIDIA GeForce GTX
- Turing generation: GTX 1660 Super, GTX 1660 Ti
- Pascal generation: GTX 1060 6GB, GTX 1070, GTX 1080, GTX 1080 Ti
- NVIDIA TITAN V
- NVIDIA Quadro: P4000, P5000, P6000, V100
Basically, import the HDRP package and go through the wizard to set up the render pipeline with DXR support.
Like this:

Unity HDRP Wizard DXR Setup
After restarting your editor, you are good to go.
2. Enable Colored Shadows in Your Directional Light
Ok, let's start with the fun.
Inspect your directional light and under shadows, enable:
- Screen-Space Shadows
- Ray-Traced Shadows
- Color Shadow
Like below.

Unity Directional Light Color Shadows
The lighting setup is now ready.
Next step? Setting up your window-like material.
3. Set Up Transparency and Refraction in Your Material
Make sure you are using the HDRP/Lit shader.
Here's what you need to set in your window material:
- Base Map: a texture/color with low alpha values.
- Surface Type: transparent.
- Refraction Mode: choose the best-fitting shape, e.g. box.
- Transmittance Color: a texture/color for the shadow projection.
Here's an example:

Unity Colored Shadows Material Setup for Refraction
- Lighting set up? Check.
- Material set up? Check.
Output?

Unity Colored Shadows Test
Output: Check.
That's solid progress.
But such shot isn't really satisfying... is it?
After all, it's just a plane, a skybox and the window.
We can do better than that.
Let's step up the ray-tracing game with a real scenario.
The Ultimate Result: Ray-Traced Colored Shadows in Unity
Curious to see how colored shadows can look in an interior?
Well, I'm not an artist, but...
I know how to buy assets.
So I took my hungry credit card and bought this dragon interior asset.
Then, I upgraded the included scene to HDRP and set up colored shadows just like I described.
The result?
I like it.
(But don't judge my art style. I'm a programmer)
Use this slider to see the visual impact colored shadows make.
The Performance Cost of Ray-Traced Colored Shadows in Unity
I know you had this question all along...
Yeah sure, it's pretty, but how much will it cost me?
I heard it. Now I have the time to answer it.
Here are some rudimentary tests I ran with my TITAN RTX beast and Ryzen 2700X.
To my surprise, in my tests I saw no increase in performance cost of colored shadows over the uncolored version.
That is, with ray-traced screen-space shadows enabled as my baseline test.
So if you are already using ray-traced screen-space shadows, colored shadows won't cost you extra.
However, enabling ray-traced shadows will cost you considerable performance juice. Remember, that's a requirement for colored shadows.
Here's the difference between ray-traced shadows ON and OFF.
In upcoming blog posts I'll discuss the performance implications in ray-tracing in more detail.
But for now, one more thing about performance...

What's Next?
If you plan to enable ray-tracing in your game, you need to make extra performance room in your game. Like, considerable room.
To help you improve the performance of your game, I prepared this Unity Performance Checklist for you.
For each performance checklist item:
- Execute it
- Tick it
- Next
And done.
If you make enough performance room for ray-tracing, then you're good to go to craft and publish a handsome experience.
Alright, see you in the next post.
~Ruben
(The Gamedev Guru)
Recommended resources
Game Engines

Unreal Engine 5 Best Practices
Amazon · Book
Written by multi-award-winning Unreal generalist Tyson J. Butler-Boschma, Founder and Creative Director of Toybox Games Studios, this book addresses common challenges you face when advancing your expertise in lighting, environment design, and cinematic storytelling.
GameDev.net may earn a commission if you purchase through these links. This helps fund the site at no extra cost to you.
Related Tutorials

Procedural Generation of 2D Tile Maps in Games
The article explains how to build a procedural 2D cave map generator using cellular automata. It covers map representat…

Localizing A Game Into French — Which Variant Should You Choose?
So, you’re making an awesome indie game, and now you’re thinking about localizing it into French? Great idea! There ar…
 Level Up Translation

How Long Does It Take To Localize An Indie Game?
So you’re planning on localizing your indie game, but you’re not sure how much time to schedule in. While the timing o…
Level Up Translation

Creating game videos: best practices and pitfalls to avoid
Game video production: practical tips on how to create a game trailer or teaser that you can be proud of. Give your aud…
 Alconost

Adopting CI/CD: How Midwinter Entertainment iterates at speed with the help of IMS
Game development was once like one long sprint: a huge effort until you reached the finish line — at which point you co…
 GameDev.net

5 Things to Consider When Making a Video to Promote Your App or Game
How can you show an app or game in your video in a way that attracts new users? Let’s take a look at what to go by when…
Alconost
Discussion
More from Ruben Torres Bonet (The Gamedev Guru)

Static Batching Like You Never Saw
Most developers think they know how static batching truly works. But that’s a lie: they don’t.
Ruben Torres Bonet (The Gamedev Guru)
Don't Let Offscreen Objects Ruin Your Performance - Unity CullingGroup API
Learn how to make your expensive scripts cost nothing while they are offscreen.
Ruben Torres Bonet (The Gamedev Guru)
Raycast Commands: A New Performance Era
Learn how to stop your current raycasts from stealing performance and upgrade them to the new era of Unity raycast comm…
Ruben Torres Bonet (The Gamedev Guru)
Discussion